
How to Remove a Car Seat From Its Base in 5 Easy Steps: No More Stuck Latches
Quick Answer
How to remove a car seat from its base? Squeeze the release handle at the back of the carrier, tilt the front up slightly, and lift it straight out. The base stays belted into the car, so you only take the carrier with you. When you put it back, set it on the base until it clicks, then tug up to confirm it locked. Learn how to install an infant car seat if you ever need to refit the base.
Quick steps
- Find the handle: Look for the release lever at the back of the carrier, behind the canopy.
- Squeeze and tilt: Squeeze the handle while you tilt the front of the carrier up a few inches.
- Lift straight up: Lift the carrier up and out of the base in one smooth motion.
- Check the base: Leave the base in place unless you plan to move it.
- Click it back: Set the carrier back on the base until it clicks, then pull up to test the lock.
If it will not release
- Push the carrier down into the base first, then squeeze the handle again. A crooked carrier often binds on one side.
- Never force it or pry it with a tool.
I have wrestled with plenty of infant carriers. The first time I tried one, I pulled straight up and nothing happened.
The release handle was right there, and I had missed it. Once I found it, the job took five seconds.
This guide shows how to remove a car seat from its base in both ways people mean it. First, lifting the carrier off the base for a quick errand.
Second, taking the whole base out when you move it, clean it, or switch cars.
Read your car seat manual before you start. Every brand puts its release in a slightly different spot.
In This Guide
- What Is a Car Seat Base?
- How to Remove a Car Seat From Its Base: Lift the Carrier Off
- How to Remove the Base Itself From the Car
- Where Is the Release Handle on Each Brand?
- What If the Car Seat Will Not Release From the Base?
- How to Put the Car Seat Back on the Base Safely
- When Should You Take the Base Out of the Car?
- Frequently Asked Questions
What Is a Car Seat Base?
A car seat base is the part that stays fixed in your car. It locks to the vehicle with LATCH lower anchors or with the seat belt, and the infant carrier clicks into it.
That two-part design is the point of an infant carrier system. You leave the install in the car and carry only the seat with the baby in it.
Most bases have three parts worth knowing. The release holds the carrier, the belt path guides the LATCH strap or seat belt, and the recline foot sets the angle.
Some bases add a load leg. A load leg is a metal support that drops from the front of the base to the car floor and limits how far the seat rotates in a crash.
Convertible car seats do not work this way. A convertible has no separate base and no carrier to lift out, so this guide applies to infant carriers only.
Section takeaway: The base stays in the car, the carrier clicks in and out of it, and knowing which part you mean changes every step that follows.
How to Remove a Car Seat From Its Base: Lift the Carrier Off
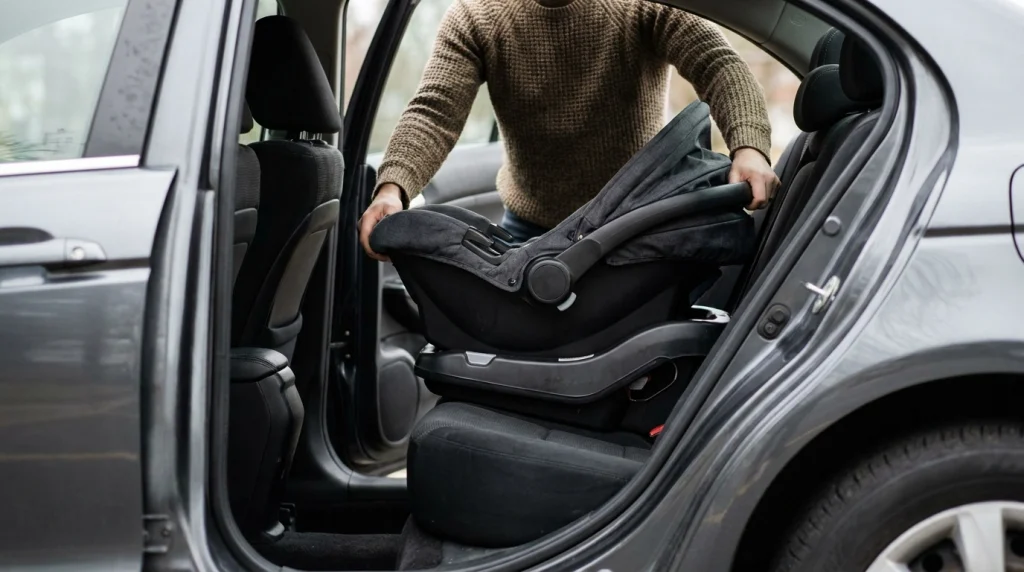
Learning how to remove a car seat from its base is a short job once you know the handle. It takes most parents under ten seconds after the first few tries.
Do it with the car parked, the engine off, and the parking brake set. A carrier full of baby is awkward to hold while you lean in.
Step 1: Open the car door fully and face the carrier
Stand at the open door with your feet planted. You need room to lift straight up, not at an angle.
Move the front seat forward if it blocks your lift.
Step 2: Find the release handle at the back of the carrier
The release sits at the back of the carrier, near the baby’s head, just behind the canopy. On most models it is a wide handle or a lever you squeeze with one hand.
Some models use two side buttons instead of one handle. Check your manual if you cannot find it by feel.
Step 3: Squeeze the handle and tilt the carrier
Squeeze the release handle fully and hold it. While you hold it, tilt the front of the carrier up a few inches.
The tilt matters more than the pull. The carrier hooks in at the front, so lifting straight up while hooked just jams it.
Step 4: Lift the carrier straight up and out
With the handle still squeezed, lift the carrier up and toward you in one smooth motion. Keep it level once it clears the base, and use both hands on the carry handle.
Step 5: Set the carrier down on a flat, stable surface
Put the carrier on the ground, a stroller frame, or a flat table. Never set it on a shopping cart seat or a car roof, where it can tip off in seconds.
Pro tip: If your manual shows a different release shape than the one described here, follow the manual. Brand designs change by model year, and the manual for your exact seat wins over any general guide.
Section takeaway: Squeeze the back handle, tilt the front up, then lift straight out, and the carrier comes free without a fight.
How to Remove the Base Itself From the Car
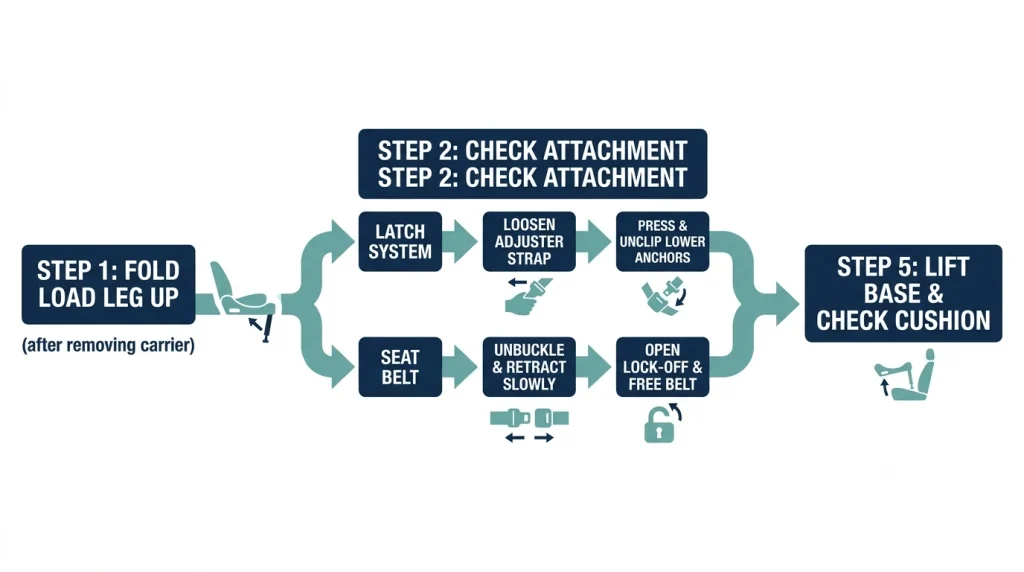
Removing the base is a separate job from lifting the carrier out. Take the carrier out first, then work on the base with both hands free, and give yourself five to ten minutes.
Step 1: Lift the carrier out and fold the load leg up
Remove the carrier using the steps above, then fold the load leg up against the base if yours has one. A load leg left down will snag on the seat as you pull the base out.
Step 2: Find how the base is attached
Look at the belt path on the base. You will see either two LATCH connectors clipped to the car’s lower anchors or a seat belt threaded through the path, and your base uses one method at a time.
LATCH is the system of lower anchors built into the back seat. The anchors are metal bars hidden in the crease where the seat back meets the seat cushion.
Step 3: Loosen the strap before you unhook anything
Find the adjuster on the LATCH strap. Lift the adjuster lever and pull the strap to feed slack into it, because a tight strap holds the connectors under load and they will not unclip until that load is gone.
For a seat belt install, unbuckle the belt and let it retract slowly. Hold it so it does not snap back and catch on the base.
Step 4: Unhook the LATCH connectors or free the seat belt
Press the release button on each LATCH connector and pull it off the anchor bar, one side at a time. Some need a firm squeeze, while others need a push toward the anchor first, then a press and pull.
If the base was installed with the seat belt, open any lock-off clip on the base, then lift the belt out of the belt path once it is unbuckled.
Step 5: Lift the base out and check the seat
Lift the base straight up and out, then check the car cushion for dents, damp spots, or crumbs trapped underneath.
What LATCH is and how its lower anchors work helps if the anchor bars feel hard to find, as they sit deep in some vehicles.
Section takeaway: Loosen the strap first, unhook second, and the base comes out without a struggle.
Where Is the Release Handle on Each Brand?
Every brand puts the carrier release in roughly the same place, but the shape changes. The table below covers the most common infant carriers sold in the United States as of 2026, so confirm the exact shape in your manual.
| Brand and carrier | Release location | How it works | Watch out for |
|---|---|---|---|
| Graco SnugRide | Handle at the back of the carrier | Squeeze the handle, tilt the front up, lift out | It sits close to the canopy hinge, so squeeze the release and not the canopy |
| Chicco KeyFit | Lever at the back, under the canopy edge | Lift the lever with one hand, tilt and lift the carrier | It needs a full lift, and a half lift will not free the hooks |
| Britax | Release handle at the back of the carrier | Squeeze the handle, tilt the front up, lift out | Some models add a second lock, so check the manual if one squeeze does nothing |
| UPPAbaby Mesa | Handle at the back of the carrier | Squeeze the handle, lift the carrier straight up | Push it down first if it feels stuck |
| Evenflo | Release lever at the back of the carrier | Lift or squeeze the lever, tilt and lift out | Lever shape varies by model |
| Doona | Release buttons on the sides of the seat | Press both side buttons, then lift the seat off the base | Fold the wheels in before you lift it off the base |
I learned the Graco versus Chicco difference the hard way. I helped a neighbour with a KeyFit and squeezed where the Graco handle would be, and nothing moved, because her lever sat lower and needed a lift, not a squeeze.
For a Doona, the seat must sit flat on the base before the side buttons work, so press it down first if they feel stiff.
Section takeaway: The release is almost always at the back of the carrier, and the manual diagram settles any doubt in seconds.
What If the Car Seat Will Not Release From the Base?
A stuck carrier rarely means the seat is broken. It usually means the carrier is sitting crooked, the handle is half squeezed, or crumbs are jamming the latch.
Is the carrier sitting crooked on the base?
Push the carrier down firmly into the base with both hands. A carrier that clicked in on one side only will bind on the other, so pressing it down seats both hooks.
Is the release handle only half squeezed?
Squeeze the handle all the way to its stop, using your palm for more force. A half squeeze moves the latch, but not enough to clear the hook.
Is something blocking the latch?
Look into the gap between the carrier and the base. Crumbs, a dropped toy, or a blanket edge can wedge in the latch area, so pick out any debris you can see with your fingers.
Never poke inside the latch with a screwdriver or a knife. A scratched latch can fail later, and you will not see the damage.
Is cold weather stiffening the plastic?
Plastic latches feel stiff on cold mornings, so warm the car for a few minutes and try again. Do not pour hot water on the base or hit it, as heat and impact can warp the plastic.
When should you stop and get help?
Stop if the handle feels loose, the latch rattles, or part of the base looks cracked. Those signs point to damage, not a jam, so call the car seat maker or visit a certified child passenger safety technician for an in-person check.
NHTSA lists free car seat inspection stations.
Section takeaway: Push the carrier down, squeeze fully, clear debris, and stop for expert help if the latch feels damaged.
How to Put the Car Seat Back on the Base Safely
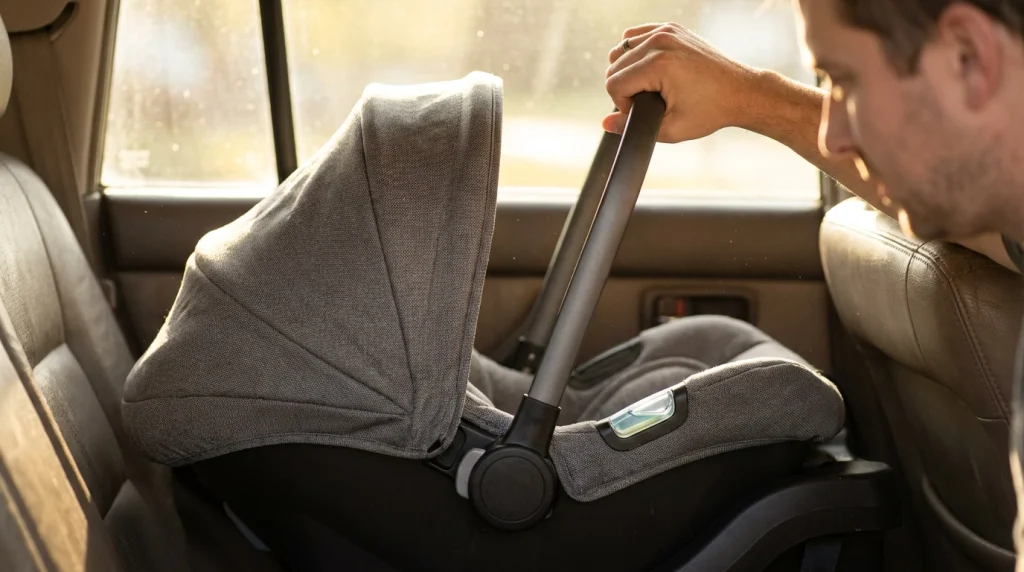
Putting the carrier back is the reverse of taking it out, and the click is the whole test. No click means no lock, and no lock means no ride.
Set the carrier on the base with the baby facing the rear of the car. Line up the front hooks first, lower the back down, and press firmly until you hear a sharp click.
Pull up on the carrier handle to test the lock. It should not lift off at all.
Check the level indicator. The bubble or line should sit inside the marked range.
Recline matters most for newborns. A newborn needs a more reclined angle so the head does not flop forward, and a rocking carrier usually missed one front hook, so lift it off and set it down again.
Check whether your car seat is installed correctly after any refit, not just after a full install. The one-inch test and the level check take a minute and catch most mistakes.
Section takeaway: Line up the front hooks, press down for a sharp click, pull up to test, and check the level before you drive.
When Should You Take the Base Out of the Car?
Most days, leave the base where it is. Every reinstall risks a wrong angle or tightness.
Take the base out when the reason is real. Switching cars, deep cleaning, flying with the seat, or moving it to a second car all count, and crumbs under a fixed base can tilt it over time.
Take it out if the car goes in for repair work near the back seat, as that work can disturb the anchors.
Do not remove the base just to carry the baby inside in the carrier. That is what the release handle is for, and the base can stay right where it is.
Store a removed base indoors, out of direct sun and off a damp garage floor. Check its expiration date before you reinstall it, as bases expire with the seat.
How car seats are installed gives the full picture if you are refitting the base in a new car.
Section takeaway: Leave the base in place for daily use, and take it out only to move cars, clean deeply, travel, or repair.
Frequently Asked Questions
Can I remove a car seat from its base with the baby in it?
Yes, that is the normal way to use an infant carrier. Lift it off with the baby strapped in, carry it by the handle with both hands, and set it on a flat surface.
Do I need to remove the base to take the car seat out?
No, the carrier lifts off on its own. Remove the base only to move it to another car, clean under it, or travel without the car.
Why does my car seat feel stuck on the base?
The carrier is often sitting crooked, or the release handle is only half squeezed. Push the carrier down, squeeze the handle fully, tilt the front up, and lift again.
Can I install the base with the seat belt instead of LATCH?
Yes, most bases allow either method, but use only one at a time. Follow the belt path in your manual, lock the belt, and check the base moves less than one inch side to side.
Do I need to remove the load leg before I take the base out?
Fold the load leg up against the base first. A load leg left down will snag on the car seat and make the base hard to pull free.
How do I know the car seat clicked back onto the base?
You will hear a sharp click, and the carrier will not lift off when you pull up on the handle. Check the level indicator too, and refit it if it rocks or feels loose.
Can I use the carrier without the base?
Many infant carriers can be installed without the base using the seat belt, following the belt path on the carrier. Check your manual first, as not every model allows it.
How to install a car seat using the LATCH system safely and tightly is worth reading before you refit a base that came out for travel or cleaning.
What a car seat load leg is and how it works explains the support leg you fold up before removing the base.
Pro tip: For a second opinion on any install, book a free check with a certified child passenger safety technician, using Consumer Reports guidance or your local inspection station, and check Edmunds for vehicle-specific anchor locations.
How to remove a car seat from its base takes five seconds once the handle feels familiar. Find the release, tilt the front up, and lift straight out.
Keep the base in the car for daily use, loosen the strap before you unhook it, and always test the click when the carrier goes back on.

Daniel Brooks is an automotive writer and product researcher focused on car accessories, car tech, maintenance, and practical driving guides. At Plug-in Car World, he helps drivers make smarter automotive decisions through honest reviews and research-driven content.