
How to Install an Infant Car Seat? Step-by-Step Guide for New Parents
Quick Answer
How to install an infant car seat? Fit the base rear-facing in the back seat, attach it with LATCH or a locked seat belt, check the recline angle, then click the carrier in until it locks. The base should move less than one inch side to side at the belt path, and the harness should sit snug on your baby. Learn how to install a rear-facing car seat step by step before your first drive.
Install it in 6 quick steps
- Pick the spot: Use the back seat, and check your vehicle manual for the best rear-facing position.
- Set the angle: Adjust the base recline so the indicator sits in the correct range for a newborn.
- Attach the base: Use LATCH or a locked seat belt, never both unless your manuals allow it.
- Test for movement: Push the base at the belt path and confirm it moves less than one inch.
- Click the carrier in: Lower the infant carrier onto the base until you hear and feel a clear lock.
- Fit the harness: Set the straps at or below the shoulders, snug the harness, and place the chest clip at armpit level.
Before you drive
- Do a final tug test on the base and carrier, check the recline again, and book a free seat check with a certified technician if anything feels loose or unclear.
I still remember the first infant seat I fitted in my own garage, a carrier and base for a friend’s newborn in a Honda CR-V.
I spent longer reading the labels than turning any wrench, and that slow first install taught me the real lesson.
An infant seat is not hard once you know the order, but it is unforgiving if you rush the base, the angle, or the harness.
In This Guide
- What Is an Infant Car Seat, and How Is It Different?
- What Should You Check Before You Install an Infant Car Seat?
- How Do You Install an Infant Car Seat Base With LATCH?
- How Do You Install an Infant Car Seat With a Seat Belt?
- How Do You Fit Your Newborn in the Seat Correctly?
- How Do You Check the Install and Fix Common Mistakes?
- Frequently Asked Questions
What Is an Infant Car Seat, and How Is It Different?
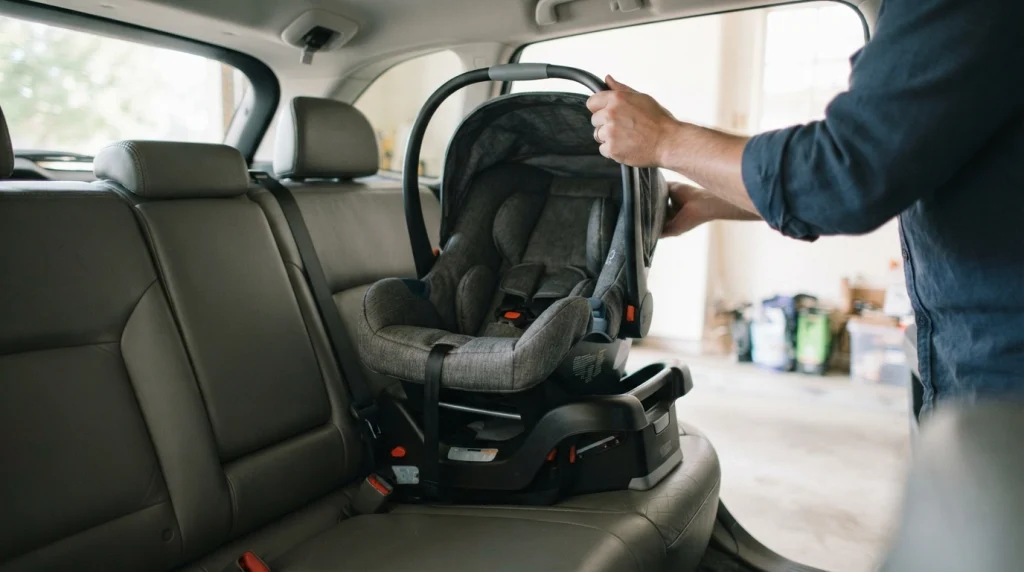
An infant car seat is a rear-facing-only seat made for a newborn and a small baby.
It has two main parts: a light carrier that holds your baby, and a base that stays fixed in the car.
You lift the carrier out by its handle, carry your baby in it, and click it back onto the base for the next drive.
That split design is the main difference from a convertible seat.
A convertible seat stays in the car, starts rear-facing, and later turns forward-facing as your child grows.
An infant seat never turns forward-facing, and you replace it once your baby passes its height or weight limit.
Always check the label on your seat, not a general age guide, before you decide your baby still fits.
What parts should you know before you start?
The base is the anchor, with a recline foot, a belt path, LATCH connectors, and a recline indicator.
The carrier has the harness, the chest clip, the handle, and the release lever that frees it from the base.
I practised clicking the carrier in and out three times before I fitted the base in that CR-V.
Why must an infant seat always face the rear?
A newborn has a large head, a weak neck, and soft bones.
In a crash, a rear-facing seat spreads the force across the back of the seat and supports the head, neck, and spine together.
Safety guidance in the United States, including guidance from NHTSA, keeps infants rear-facing for as long as possible within the seat limits.
That is why the angle, the harness, and the tight base matter so much.
Section takeaway: An infant seat is a rear-facing carrier plus a fixed base, and it works only when the base is tight, the angle is right, and the harness is snug.
What Should You Check Before You Install an Infant Car Seat?
Do these checks before you put the base in the car.
They take about 10 minutes, and they save most of the rework I see at seat checks.
Have you read both manuals?
Read the car seat manual and the vehicle owner’s manual together.
The seat manual tells you the limits, the belt path, and the recline range.
The vehicle manual tells you where LATCH anchors sit, which seats allow a rear-facing install, and whether the centre seat has anchors.
Does the seat fit your car?
Not every infant seat fits every back seat well, so check the seat width, the front-seat legroom with the base in place, and the slope of your vehicle seat.
A deep bucket seat or a steep slope can change the recline, even if the seat looks fine at first glance.
Learn how to check car seat compatibility with your vehicle before you buy or borrow a seat for a small car.
If the front seat must slide too far forward for the driver, try another seating position first.
Is the seat in date and undamaged?
Check the expiry date moulded into the shell or printed on the label.
Check for cracks, missing foam, frayed straps, a stiff buckle, or a base that no longer locks cleanly.
Do not use a seat with an unknown crash history, because a seat that looks fine can have hidden damage after a crash.
Pro tip: Check the seat and your vehicle for recalls on NHTSA’s recall lookup, and follow the owner’s manual over any general advice in this guide.
- Remove loose items: Take mats, towels, and thick seat protectors out unless your seat manual allows them.
- Clear the belt path: Make sure the vehicle belt or LATCH strap has a straight, flat route.
- Check the anchors: Feel for the LATCH anchors between the seat cushions and clear any debris from them.
Section takeaway: Read both manuals, confirm the fit, check the expiry and damage, and clear the seat before you tighten anything.
How Do You Install an Infant Car Seat Base With LATCH?
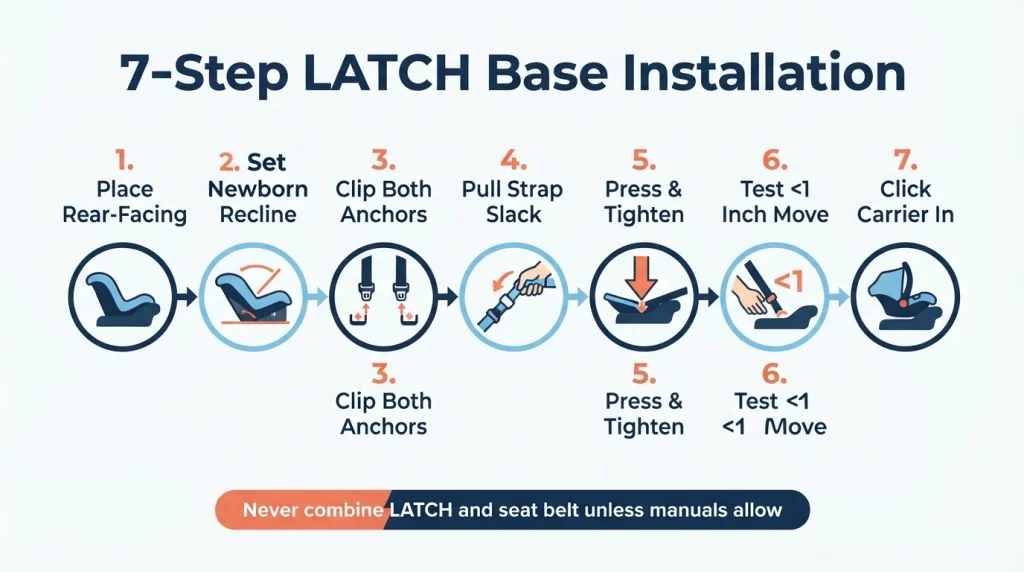
LATCH is the most common way to fit an infant base at home.
LATCH stands for Lower Anchors and Tethers for Children, and it uses metal anchors built into your vehicle seat.
Use it only if both manuals allow it for your seat and your seating position.
Slide your hand into the crack between the vehicle seat back and the seat cushion to find the two small metal bars, often marked with a child-seat tag.
The centre rear seat often has no dedicated anchors, so do not borrow anchors from the two outer seats unless your vehicle manual allows it.
Learn how to install a car seat using the LATCH system safely and tightly in detail if your anchors are hard to reach or your strap keeps slipping.
- Place the base: Set it rear-facing on the chosen back seat, flat against the vehicle seat back.
- Set the recline: Extend or fold the recline foot until the indicator shows the newborn range.
- Connect the straps: Clip each LATCH connector onto its anchor and listen for a click on each side.
- Remove the slack: Pull the LATCH strap tail straight while you press down firmly on the base.
- Press and tighten: Put your knee or hand weight into the base, near the belt path, and pull again.
- Test the movement: Grip the base at the belt path and push side to side and front to back.
- Click the carrier in: Lower the carrier onto the base, listen for the lock, and tug up to confirm it holds.
Pressing down while you tighten is the step most people skip, because your weight compresses the vehicle cushion.
LATCH has a combined weight limit for the child plus the carrier, and your seat manual gives that limit.
Once your baby plus the carrier pass it, switch to a seat-belt install.
Do not use LATCH and a seat belt together unless both manuals clearly allow that combination.
| Install method | Best for | Watch out for |
|---|---|---|
| LATCH base | Everyday use in your own car, quick carrier clicks | Weight limit, no anchors in some centre seats |
| Seat belt base | Heavier babies, centre seats, cars without LATCH | Belt must lock, routing must match the manual |
| Carrier without base | Taxis, hire cars, and short trips in another car | European belt routing, recline is harder to judge |
Section takeaway: With LATCH, set the recline first, clip both anchors, press down while you tighten, and confirm the base moves less than one inch.
How Do You Install an Infant Car Seat With a Seat Belt?
A seat-belt install is just as safe as LATCH when it is done right.
It is the method you need for a centre seat without anchors, for a heavier baby, and for many older cars.
Most modern belts lock when you pull the shoulder belt all the way out and let it retract.
You will hear clicks as it feeds back in, and it will not pull out again until you unbuckle it.
If the belt will not lock, stop and try another seating position or method.
- Place and recline: Set the base rear-facing and adjust the recline foot to the newborn range.
- Route the belt: Thread the lap and shoulder belt through the base belt path shown in blue on most seats.
- Buckle and lock: Buckle the belt, pull the shoulder belt out fully, then let it retract to lock.
- Press and tighten: Press down on the base while you pull the shoulder belt to remove slack.
- Test the movement: Check for less than one inch of movement at the belt path.
- Click the carrier in: Fit the carrier, listen for the lock, and tug up to confirm it holds.
Learn how to install a car seat using a seat belt in detail if your car has an unusual belt or latch plate.
Follow the blue rear-facing path, not the forward-facing path on a convertible seat.
Some infant carriers allow a baseless install with the vehicle belt, which is useful for travel.
Place the carrier rear-facing, route the belt through the carrier guides as your manual shows, lock the belt, and test for movement at the belt path.
Section takeaway: A seat-belt install is safe when the belt locks, the routing matches the blue rear-facing path, and the base stays tight.
How Do You Fit Your Newborn in the Seat Correctly?
A tight base means little if the harness is loose.
Your baby must sit low in the seat, with the straps flat and snug, every single ride.
For a rear-facing infant, the harness straps should sit at or just below the shoulders.
Use the slot closest to that position, and move it up as your baby grows.
Straps above the shoulders can let a small baby slide up in a crash, so check the slot each month.
Snug the harness until you cannot pinch a fold of strap at the collarbone.
This is the pinch test, and it is the fastest check you can do before every drive.
Remove bulky coats and snowsuits first, because they compress and leave slack you cannot see.
Dress your baby in thin layers, then add a blanket over the harness if it is cold.
Consumer Reports has long stressed a snug, flat harness for infant seats, and you can read its current child-seat guidance on Consumer Reports before you buy a new model.
Place the chest clip at armpit level, centred on the chest, after you snug the harness.
A clip on the belly cannot hold the straps on the shoulders, and a clip near the neck can press on soft tissue.
A newborn needs a more reclined angle than an older baby, so use the newborn range on your recline indicator.
If the head flops forward, the seat is often too upright, the harness is loose, or the insert is wrong for your baby.
Use only the infant insert that came with your seat, and remove it when your baby reaches the limit in the manual.
Learn how to position a newborn’s head safely in a car seat if the head still slumps after you fix the angle and harness.
Never add aftermarket head supports, pillows, or strap covers unless your seat manual allows them.
Section takeaway: Straps at or below the shoulders, no pinchable slack, chest clip at armpit level, and the recline in the newborn range.
How Do You Check the Install and Fix Common Mistakes?
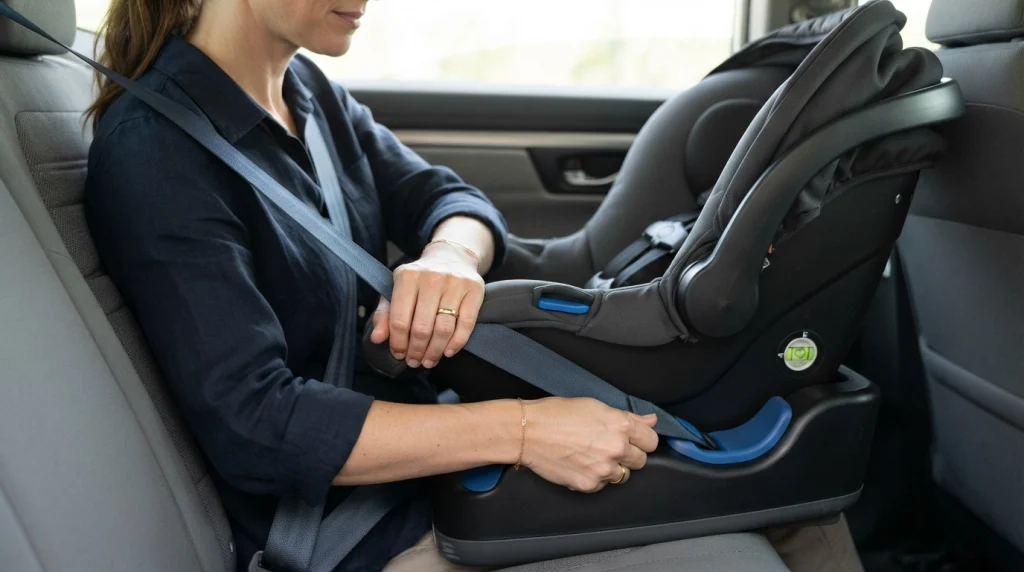
Do this check after every install, and again after you move the seat.
It takes two minutes, and it catches most errors before you drive.
Grip the base at the belt path, where the LATCH strap or vehicle belt passes through.
Push it side to side and front to back with firm force, and it should move less than one inch in any direction.
Do not test it at the front edge of the carrier, because that end will move more by design.
Test at the belt path only, and re-tighten if it moves more than that.
- Recline indicator: Confirm it still sits in the correct range after you tighten the base.
- Carrier lock: Tug up on the carrier handle and confirm the base holds it firmly.
- Handle position: Set the carry handle to the travel position shown in your seat manual.
- Buckle and clip: Confirm the buckle clicks, the chest clip is at armpit level, and the straps are flat.
- One method only: Confirm you used LATCH or a seat belt, and the unused belt is not pressing on the seat.
Learn how to check whether your car seat is installed correctly with a full checklist if you want a second pass after your first install.
The most common error is a loose base, often because parents test it at the wrong spot or stop tightening too soon.
The next error is a loose harness, often hidden by a thick coat.
Other common errors include the wrong recline, straps in the wrong slots, and a chest clip that sits too low.
Edmunds and Edmunds, and the safety advice on Car and Driver, both repeat the same point: read your exact manuals, then get a hands-on check before your due date.
Section takeaway: Test at the belt path, recheck the recline and harness, and get a certified check if the base still moves or the fit feels wrong.
Frequently Asked Questions
Can I install an infant car seat without the base?
Yes, if your carrier manual allows a baseless install.
Route the vehicle belt through the carrier guides, lock the belt, and test for less than one inch of movement at the belt path.
Should I use LATCH or a seat belt for an infant seat?
Use the method that gives the tightest install in your car and seating position.
LATCH is often easier in your own car, while a seat belt is needed for many centre seats and heavier babies.
How tight should the base be?
The base should move less than one inch side to side or front to back when you push it at the belt path.
Test it with firm force, not a light touch, and re-tighten if it moves more than that.
What recline angle should an infant car seat have?
Use the newborn range on your base or carrier recline indicator.
A newborn needs a more reclined angle to keep the airway open and stop the head flopping forward.
Can I put an infant car seat in the front seat?
No, unless your vehicle manual and local law allow it and the airbag is off, which is rare.
The back seat is the safest place for a rear-facing infant seat, even for a short ride.
When should I move my baby out of an infant car seat?
Move your baby when they pass the height or weight limit on your seat label, or when the top of the head is within one inch of the shell top.
Move to a rear-facing convertible seat next, not to a forward-facing seat.
Do I need a professional car seat check?
It is not required, but it is worth doing.
A certified technician can check the base, the angle, and the harness in person and show you how to fix any error.
Fit the base, test it at the belt path, click the carrier in, and snug the harness every ride.
If anything feels loose or unclear, stop and recheck it or book a seat check before you drive.

Daniel Brooks is an automotive writer and product researcher focused on car accessories, car tech, maintenance, and practical driving guides. At Plug-in Car World, he helps drivers make smarter automotive decisions through honest reviews and research-driven content.