How Are Car Seats Installed? Step-by-Step Guide 2026
Quick Answer
Car seats are installed with either the LATCH system or the vehicle seat belt, never both at once unless the manual allows it. You route the belt or connectors through the correct belt path, press the seat down with your body weight, tighten until it moves less than an inch, then set the recline angle and attach the top tether for forward-facing seats. This LATCH installation guide walks through the connector steps in more detail.
The install in short
- Pick one method: Use LATCH or the seat belt, not both, unless your car seat manual says otherwise.
- Use the right path: Rear-facing and forward-facing seats use different belt paths, so check the labels on the shell.
- Tighten with weight: Kneel or press into the seat while you pull the strap tight.
- Do the inch test: Grip the seat at the belt path and tug side to side and front to back.
- Set the angle: A newborn needs a reclined angle, while an older child can sit more upright.
- Add the tether: Forward-facing seats always need the top tether attached.
Before you drive off
- Check the harness, the chest clip, and the recline indicator one more time.
- If anything feels loose or unclear, get the install checked before your next trip.
I’ve installed car seats in my own cars, in friends’ cars, and in a rental on a family trip. The first time took me nearly an hour and a lot of sweat.
It gets faster with practice, but it never becomes a job to rush. This guide covers the full process, from choosing LATCH or a seat belt to the final tightness check.
In This Guide
What Does Installing a Car Seat Actually Involve?
A car seat installation is the job of fixing a child seat firmly to a vehicle seat so it moves with the car, not with the child. The seat must stay put in a sudden stop.
That sounds simple. In practice, it means matching the seat to the car, routing a belt or connectors the right way, and tightening everything until the seat barely moves.
Most installs take 15 to 30 minutes once you know the steps. Your first install may take longer, and that is normal.
What do you need before you start?
Start with three things: the car seat, your vehicle owner’s manual, and the car seat manual. Keep both manuals open while you work.
The car seat manual tells you which belt path to use and how the recline works. Your vehicle manual tells you where the LATCH anchors and tether anchors sit.
You do not need special tools for most seats.
- Your manuals: Keep them in the car until the install is done.
- A flashlight: LATCH anchors hide deep in the seat crease.
Check the seat itself before you carry it to the car. Look for cracks, missing parts, and frayed straps.
Check the expiry date on the label too. An expired seat should not be used, even if it looks fine.
Pro tip: check the NHTSA recall lookup for your seat model before you install it, and follow your car seat manual over any general advice in this guide.
Where should the car seat go?
The back seat is the safest place for a child. The centre rear seat is often the furthest from a side impact, but only use it if the seat installs tightly there.
Many cars have LATCH anchors only in the outboard rear seats, so the centre seat may need a seat belt install instead. Never install a rear-facing seat in front of an active airbag.
Pick the seating position first, then choose your install method to match it.
Section Takeaway: A good install starts before you touch a strap, with the right seat, both manuals, and the seating position that gives the tightest fit.
LATCH or Seat Belt: Which Should You Use?
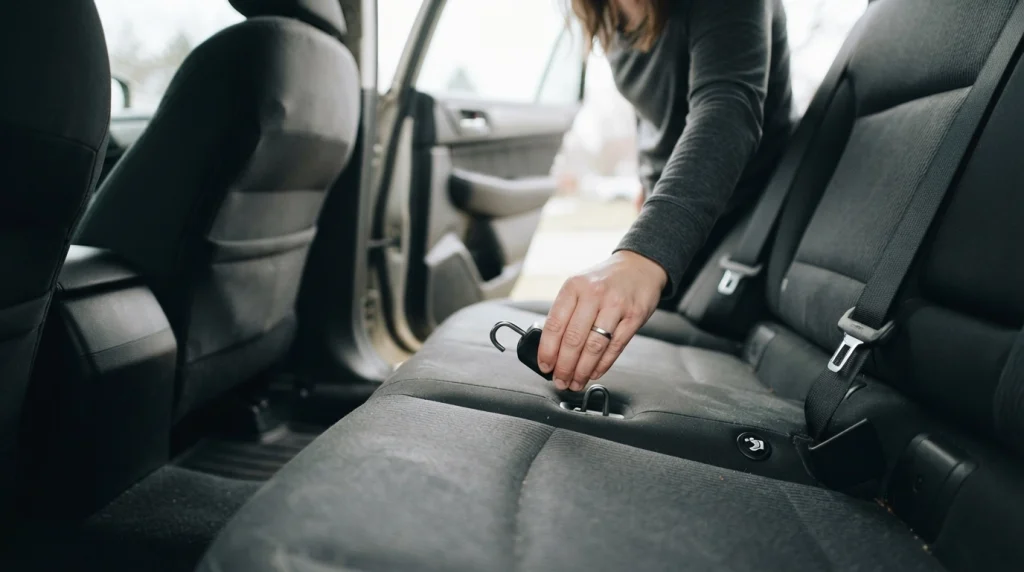
Should you use LATCH or the seat belt? Either method is safe when it is done correctly.
LATCH stands for Lower Anchors and Tethers for Children. It is a set of built-in anchors in your vehicle that the car seat clips onto.
The seat belt method uses the vehicle’s own belt to hold the seat. Both methods hold the seat in a crash when they are tight.
| Feature | LATCH install | Seat belt install |
|---|---|---|
| What holds the seat | Lower anchor connectors clipped to vehicle anchors | Vehicle seat belt routed through the belt path and locked |
| Best for | Outboard rear seats with easy-to-reach anchors | Centre seats, older cars, and heavier children |
| Weight limit | Check both manuals; LATCH has a combined child-plus-seat weight limit | No LATCH weight limit applies; follow the seat manual |
| Common struggle | Finding anchors buried in the seat crease | Locking the belt so it does not feed back out |
| Top tether | Still required for forward-facing seats | Still required for forward-facing seats |
I used LATCH in my Honda CR-V for years because the anchors were easy to reach. In my older sedan, the seat belt gave a tighter fit.
Same seat, different car, different answer. Try both methods if your manuals allow it, then keep the tighter one.
How does LATCH installation work?
Find the lower anchors in the crease where the seat back meets the seat cushion. They feel like small metal bars, and many cars mark them with a small tag.
Route the LATCH strap through the correct belt path for the direction you need. Rear-facing and forward-facing paths are different, so follow the labels on the seat shell.
Clip each connector onto its anchor until it clicks. Pull the strap tail to remove slack, pressing down into the seat as you tighten.
Do not use LATCH and the seat belt together unless both manuals say you can.
How does seat belt installation work?
Route the vehicle belt through the correct belt path, then buckle it. Pull the belt tight while you press down into the seat with your knee or body weight.
Then lock the belt. Most modern cars lock the belt when you pull it all the way out and let it retract, and some car seats have a built-in lock-off instead.
Your vehicle manual will tell you which locking method your car uses. This seat belt installation guide covers the locking step in detail.
Feed the belt back slowly and keep pressure on the seat. The belt should stay tight, with no slack creeping back in.
Consumer Reports stresses that a tight install matters more than the method you pick, and that matches what I have seen in real cars.
Section Takeaway: LATCH and seat belt installs are both safe when tight, so test both in your car and keep the method that moves less than an inch.
How Do You Install a Rear-Facing Car Seat?
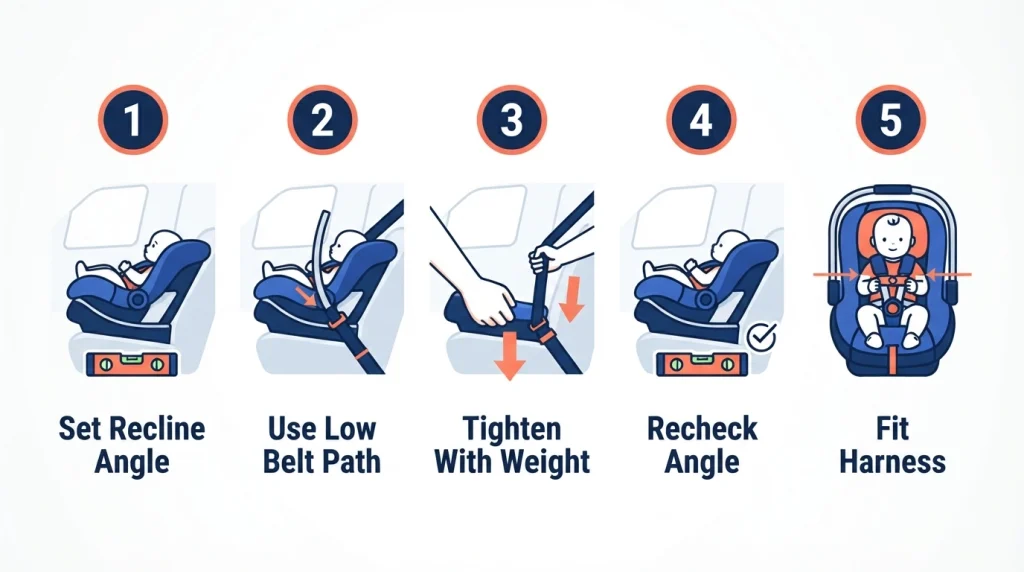
How do you install a rear-facing car seat? You face it toward the back of the car, route the belt or LATCH strap through the rear-facing belt path, set a reclined angle, and tighten until it barely moves.
Rear-facing is the position for babies and toddlers, and it stays that way until they outgrow the seat’s rear-facing limits. The shell cradles the head, neck, and spine in a crash.
Start by reclining the seat to the angle shown on its indicator. A newborn needs a more reclined angle so the head does not flop forward.
An older toddler can sit a little more upright, within the range the manual allows. Check the indicator on level ground, not on a slope.
Place the seat on the vehicle seat and route the strap through the rear-facing belt path. That path sits low on the shell, near the baby’s feet.
Connect LATCH or buckle the seat belt, then press down firmly into the seat. I kneel in the seat with one knee and pull the strap with both hands.
Tighten in small pulls rather than one hard yank. Check the angle again after tightening, because pressing down can change it.
Set the harness before you put the baby in. The straps should sit at or below the shoulders for a rear-facing child.
The chest clip goes at armpit level. Do the pinch test at the collarbone: if you can pinch a fold of strap, it is too loose.
Read the rear-facing installation guide if your seat has a load leg or anti-rebound bar. Those parts add steps, and they must sit correctly to work.
A load leg extends to the vehicle floor, and an anti-rebound bar sits against the vehicle seat back. Both must touch the right surface to work.
Section Takeaway: Rear-facing installs live or die on the recline angle, so set it first, tighten with your body weight, and recheck the angle after the seat is tight.
How Do You Install a Forward-Facing Car Seat?
How do you install a forward-facing car seat? You face it toward the front of the car, use the forward-facing belt path, tighten it the same way, and always attach the top tether.
Children move forward-facing only after they outgrow the rear-facing limits of their seat. Check the height and weight limits on the label, not just their age.
Route the belt or LATCH strap through the forward-facing belt path. That path sits higher on the shell, behind the child’s back.
Press down into the seat and tighten until it moves less than an inch at the belt path. The top of the seat will still move a little, and that is normal.
Now attach the top tether. This is the step people skip most, and it matters most.
The tether is a strap at the top of the car seat. It hooks to an anchor behind the vehicle seat, on the rear shelf, the seat back, the floor, or the ceiling, depending on the car.
Your vehicle manual shows the anchor location. Route the tether over the vehicle seat back, or under the headrest if the manual says so, then hook it and pull it tight.
The tether limits how far the child’s head moves forward in a crash. Without it, a forward-facing seat can tip forward more than it should.
Read the forward-facing installation guide for the tether routing in your body style, because sedans, SUVs, and pickup trucks place anchors in different spots.
Set the harness with the straps at or above the shoulders for a forward-facing child, the opposite of the rear-facing rule. The chest clip still goes at armpit level.
Pro tip: find your tether anchor in the vehicle owner’s manual before you start, and never attach the tether to a cargo hook or a headrest post unless the manual names it as a tether anchor.
Section Takeaway: A forward-facing install is not finished until the top tether is attached and tight, so treat the tether as part of the install, not an optional extra.
How Do You Check the Install Is Tight and Level?
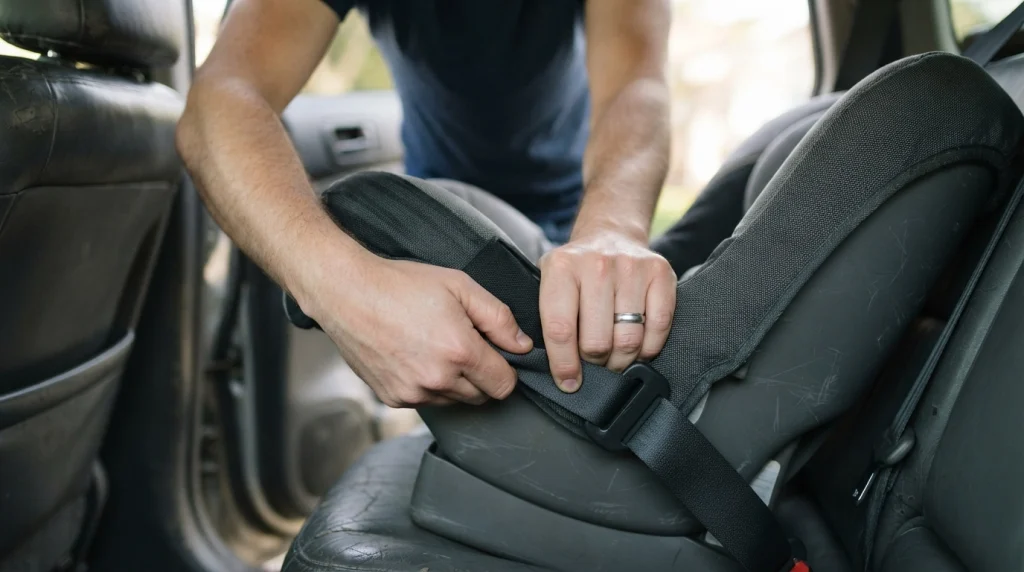
How do you check a car seat install? You tug the seat at the belt path, check the recline indicator, and run through the harness fit before every ride.
The inch test is the main check. Grip the seat where the belt or LATCH strap passes through, and try to move it side to side and front to back.
It should move less than an inch in any direction. Test at the belt path, not at the top of the seat.
The top of a rear-facing seat and the top of a forward-facing seat both move more than the base. That movement is normal and does not mean the install is loose.
Check the recline angle next. The indicator may be a bubble, a line, or a coloured window, depending on the seat.
Check it on flat ground with the car parked normally. A driveway slope can make a correct angle look wrong.
If the angle is off, loosen the install, adjust the recline foot, and tighten again.
Then check the harness. The straps should lie flat, with no twists.
Do the pinch test at the child’s collarbone. Pinch the strap vertically; if your fingers catch a fold, tighten the harness.
Learn the full check routine in this guide to checking a car seat install, and repeat the inch test and harness check each time you move the seat to another car.
Edmunds gives the same advice I give friends: recheck the install after the first few drives, because straps can settle.
Section Takeaway: Test the seat at the belt path, not the top, and recheck the angle and harness every time the seat moves cars.
What Mistakes Make a Car Seat Unsafe?
What mistakes make a car seat unsafe? A loose install, a wrong belt path, a missing tether, and a loose harness cause most of the problems I see.
A loose install is the most common mistake. Parents tighten the seat, test the top, feel movement, and assume it is fine, or they test the base and find it loose and drive anyway.
If you still cannot get it tight, try the other install method.
Using the wrong belt path is the next mistake. Rear-facing and forward-facing paths look similar on some seats, and the labels are small.
Read the label on the shell before you route anything. A seat routed through the wrong path may look tight and still fail to hold in a crash.
Skipping the top tether on a forward-facing seat is another common error. The tether is not a backup, and the install is incomplete without it.
A loose harness is just as risky as a loose install. Thick winter coats, twisted straps, and a low chest clip all add slack.
Remove bulky coats before you buckle the child in. Put the coat on backwards over the harness if the child is cold.
Using both LATCH and the seat belt together is a mistake on most seats. It can change how the seat moves, so follow the manuals, not a guess.
See the full list in this roundup of common car seat installation mistakes before your first install, and fix one mistake at a time rather than starting over from scratch.
Car and Driver makes the same point in its safety advice: the seat, the car, and the child all have to match.
Section Takeaway: Most unsafe installs come from a handful of fixable errors, so check the belt path, the tether, and the harness before you blame the seat or the car.
Frequently Asked Questions
How long does it take to install a car seat?
Most installs take 15 to 30 minutes once you know the steps. Your first install can take an hour, so allow extra time.
Is LATCH safer than a seat belt install?
No, neither method is safer when done correctly. LATCH is often easier with reachable anchors, while a seat belt install can be tighter in the centre seat.
Can you install a car seat in the middle seat?
Yes, if the seat installs tightly there and both manuals allow it. Many cars have no centre LATCH anchors, so a seat belt install is often the way to do it.
How tight should a car seat be?
It should move less than an inch side to side or front to back when you tug it at the belt path. Test at the belt path, because the top of the seat moves more.
Do you need the top tether for a rear-facing seat?
Most rear-facing seats do not use a top tether, though a few models allow an optional rear-facing tether. Follow your car seat manual, and always use the tether for forward-facing seats.
Can a car seat be installed in a car without LATCH?
Yes, a seat belt install works in cars without LATCH, and in older cars that predate the system. Lock the belt correctly and do the inch test before you drive.
When should you get a car seat installation checked?
Get it checked if the seat still moves too much, the angle looks wrong, or you are unsure about the tether. A certified child passenger safety technician can check it in person.
Installing a car seat well is a skill, not a talent. The first install feels slow and fiddly, and the second one feels easier.
Work through the steps in order, do the inch test, and check the harness before every ride. If something still feels off, get a second pair of eyes on it before you drive.

Daniel Brooks is an automotive writer and product researcher focused on car accessories, car tech, maintenance, and practical driving guides. At Plug-in Car World, he helps drivers make smarter automotive decisions through honest reviews and research-driven content.