How to Install a Graco Car Seat? Step-by-Step Guide for Parents
Quick Answer
To install a Graco car seat, pick rear-facing or forward-facing from your manual, fit the base or seat flat on the vehicle seat, attach it with LATCH or a locked seat belt, tighten until it moves less than one inch at the belt path, set the recline angle, then tighten the harness to pass the pinch test. Graco adds its own helpers, such as SnugLock and InRight LATCH on many models, but the safety checks stay the same. Start with the rear-facing install steps if your child still rides rear-facing.
Do these five checks every time
- Right direction: Rear-facing for infants and toddlers within the seat limits, forward-facing only after that.
- One method: Use LATCH or the seat belt, not both at once unless your manual says otherwise.
- Less than one inch: Grip the seat at the belt path and push side to side and front to back.
- Correct recline: Use the level indicator or bubble for a newborn, and the upright setting for an older child.
- Snug harness: Pinch the strap at the collarbone and tighten until you cannot pinch a fold.
If it still feels loose
- Remove the seat, reset the belt path, and tighten again with your knee in the seat.
- Check the manual for your exact model before you change the recline or the LATCH limit.
I have fitted Graco seats in a Honda CR-V, a Toyota RAV4, and a tight back seat in a sedan. The steps look simple on paper, yet the seat can still wobble if one strap hides under a cover.
This guide goes deeper than a quick video. It covers Graco infant carriers, convertibles, and combination seats, plus LATCH, seat belts, recline, and the checks that catch most mistakes.
A Graco car seat is a child restraint made by Graco, and most families meet it as an infant carrier, a convertible seat, or a combination seat that later works as a high-back booster. The install method changes with the mode, so start from your model and your child, not from a generic video.
In This Guide
- What Makes a Graco Car Seat Install Different?
- What Should You Check Before You Install a Graco Car Seat?
- How Do You Install a Graco Car Seat Rear-Facing?
- How Do You Install a Graco Car Seat Forward-Facing?
- Should You Use LATCH or a Seat Belt for a Graco Car Seat?
- How Do You Know a Graco Car Seat Is Tight, Level, and Safe?
- Frequently Asked Questions About Installing a Graco Car Seat
What Makes a Graco Car Seat Install Different?
Graco seats share the same safety rules as other brands. The difference sits in the hardware, the labels, and the way each model hides its belt path.
Many Graco convertibles and combination seats use SnugLock, a lock-off that clamps the seat belt or LATCH strap in place. You close it after you tighten the belt, and it helps hold that tension.
Many Graco infant bases and convertibles also use InRight LATCH, a push-button connector that clicks onto the lower anchors with one push. The button makes removal easier than a hook-style connector, and it gives a clear click when it locks.
Graco models you will see most often include the SnugRide infant carrier, the Extend2Fit convertible, the 4Ever all-in-one, the Contender convertible, and the Nautilus combination seat. Each one has its own limits, belt paths, and recline settings, so the name on the side matters.
Check the labels on the side of your seat before you start. They show the rear-facing and forward-facing weight and height limits, the belt path for each mode, and the LATCH weight limit for your model.
Pro tip: your Graco manual beats any general guide, and the NHTSA recall lookup can confirm whether your model has an open recall before you install it.
Graco publishes manuals and model details on the Graco site, and that is the best place to confirm a limit when the label is worn or unclear.
Section takeaway: Graco hardware can make tightening easier, but it does not change the safety test. The seat must still move less than one inch at the belt path.
What Should You Check Before You Install a Graco Car Seat?
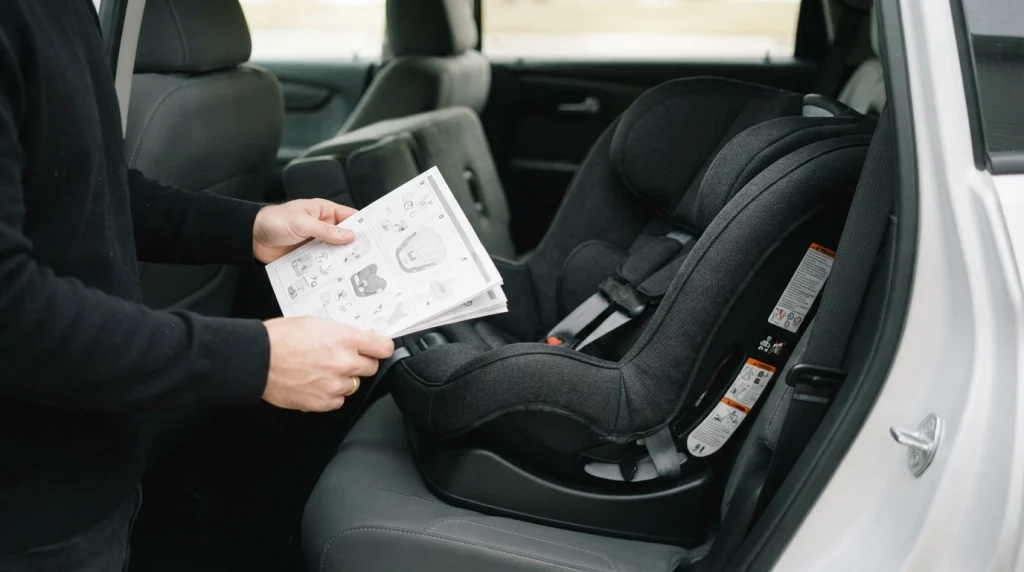
Start with the manual, not the car. Find your exact model name and date of manufacture on the label, then match it to the manual for that model.
Check the expiration date next. Graco seats expire, and an expired seat should not be used even if it looks new.
Look for damage, missing parts, and a clean harness. Check the straps for fraying, the buckle for sticky crumbs, and the base for cracks.
Pick the seating position before you lift the seat into the car. The centre rear seat often gives the most space from the doors, yet many cars have no LATCH anchors there.
Read your vehicle manual too. It shows where the lower anchors sit, where the top tether anchors sit, and whether the centre seat can use LATCH from the outboard anchors.
Clear the vehicle seat of thick mats, towels, and bulky covers. A thick layer under the base can compress in a crash and leave slack you cannot see now.
Check the harness height before you install the seat. For rear-facing, the straps should sit at or just below the shoulders. For forward-facing, they should sit at or just above the shoulders.
Do a recall check while you have the model number in hand. The NHTSA site lists recalls and complaints by model, and it takes only a few minutes.
Section takeaway: Five minutes with the labels and both manuals prevents most install errors. Do not skip this step because the seat looks familiar.
How Do You Install a Graco Car Seat Rear-Facing?
Rear-facing is the starting point for infants and for toddlers who still fit the rear-facing limits. The seat faces the rear of the car, and the harness holds the child against the shell.
Work through the base first if you have an infant carrier. The carrier clicks in and out, yet the base does the safety work.
Install a Graco infant carrier with its base
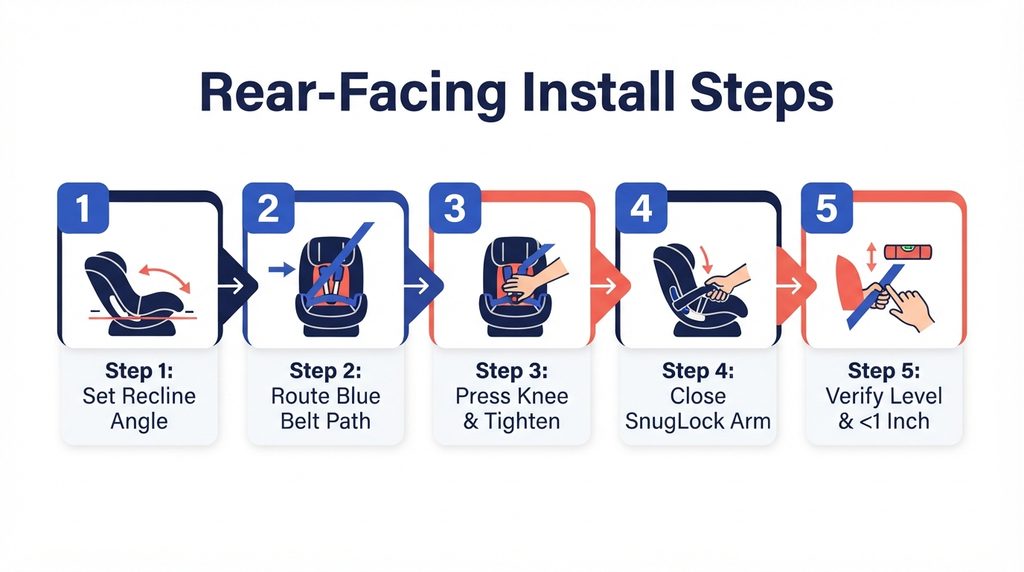
Place the base flat on the vehicle seat, with the foot or recline foot in the right position for your car. The base should sit level, not tilted up at the front.
Thread the LATCH strap or seat belt through the base belt path, not through the carrier. The path is marked on the base, often in blue for rear-facing.
Attach the LATCH connectors or buckle the seat belt, then press down on the base with your knee. Pull the strap tail tight while you keep that weight on the base.
Check the level indicator on the base. For a newborn, the bubble or line must sit in the newborn range. Adjust the recline foot until it does.
Click the carrier onto the base and listen for the click. Pull up on the carrier handle to confirm it locks, then check the handle position your manual allows for travel.
Install a Graco convertible rear-facing without a separate base
Place the convertible on the vehicle seat in rear-facing mode, with the recline set for your child. Newborns need more recline than older toddlers, so check the indicator for your child.
Find the blue rear-facing belt path on the shell. It often runs under the seat pad, so lift the pad and look for the marked slots.
Thread LATCH or the seat belt through that path. Keep the belt flat, with no twists, and make sure it does not cross the harness straps.
Put your knee in the seat and push down and back toward the vehicle seatback. Pull the LATCH tail or the seat belt tight while you hold that pressure.
Close the SnugLock arm if your model has one. It should snap shut over the belt and hold the tension you just created.
Test the install at the belt path. Grip the seat near the path, push side to side, then front to back. It should move less than one inch.
I once tightened an Extend2Fit in a RAV4 and felt proud of the one-inch test, then saw the bubble had moved. I loosened it, reset the recline, and tightened it again, and the second try held both the angle and the tightness.
Section takeaway: Rear-facing installs fail most often on recline or tightness, not on direction. Check both after you tighten, not before.
How Do You Install a Graco Car Seat Forward-Facing?
Forward-facing comes only after your child passes the rear-facing limits for height or weight in your Graco manual. Do not rush this step to gain legroom.
Start by switching the seat to forward-facing mode. Move the recline to the forward-facing setting, route the harness to the forward-facing slots, and find the forward-facing belt path.
Place the seat flat against the vehicle seatback, with no gap behind it. The seatback should support the car seat shell, not leave it leaning forward.
Attach the top tether before you tighten the main belt if your manual allows that order. The tether limits forward head movement, and many parents forget it on a first forward-facing install.
Thread LATCH or the seat belt through the forward-facing path, which is often marked in red or orange. Keep the belt flat and clear of the harness.
Put your knee in the seat, push it back and down, then pull the strap tight. Close the SnugLock arm if your model has one, then test the one-inch movement at the belt path.
Tighten the top tether last, and remove the slack without pulling the seat off the vehicle seat. The tether should feel snug, not bowstring tight.
Set the harness height for forward-facing now. The straps should come from at or just above the shoulders, and the chest clip should sit at armpit level.
Learn the forward-facing install steps in detail if this is your first switch, because the tether and the belt path change together.
Section takeaway: A forward-facing Graco seat needs three anchors of safety: a tight belt path, a snug top tether, and a harness at the right height. Miss one, and the install is not finished.
Should You Use LATCH or a Seat Belt for a Graco Car Seat?
Both methods are safe when you use them correctly. The better choice depends on your car, your child, and the weight limit in your Graco manual.
LATCH stands for Lower Anchors and Tethers for Children. It uses metal anchors built into the vehicle seat bight, plus a top tether for forward-facing seats.
A seat belt install uses the vehicle belt, locked at the retractor or with a lock-off, through the same belt path. It works in every seating position, including the centre.
Use LATCH only while your child stays under the LATCH weight limit in the Graco manual. That limit often sits near 65 pounds for the child plus the seat weight, yet the exact number varies by model.
Switch to a seat belt install once your child passes that limit. The seat belt can hold a heavier child, and the top tether still adds protection forward-facing.
Do not use LATCH and the seat belt together unless both manuals say you can. Most Graco manuals say to pick one method, because using both can change how the seat moves in a crash.
Read the LATCH install guide if your anchors sit deep in the seat bight, because the connector angle matters there.
Read the seat belt install guide if you use the centre seat, because that position often has no LATCH anchors.
| Method | Best for | Watch out for |
|---|---|---|
| LATCH | Quick install in outboard seats, easy removal for infant bases | Weight limit, no anchors in many centre seats |
| Seat belt | Centre seat, heavier children, cars with deep anchors | Must lock the belt, must keep it flat and untwisted |
| Top tether | Every forward-facing install, with LATCH or belt | Easy to forget, must remove slack after tightening |
Section takeaway: LATCH is not safer than a seat belt, and a seat belt is not safer than LATCH. The tighter, correct install is the safer one.
How Do You Know a Graco Car Seat Is Tight, Level, and Safe?
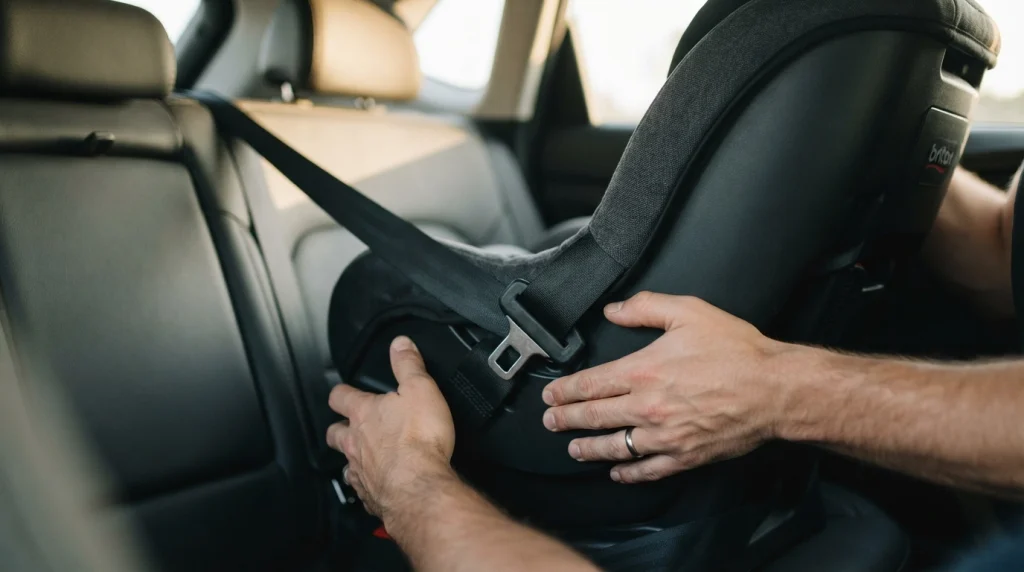
Use the same four checks after every install, and repeat them when you move the seat to another car. A seat that felt tight last month can loosen after a wash or a seat swap.
Start with the one-inch test. Grip the car seat at the belt path only, not at the top, and push it side to side and front to back.
Learn how tight a car seat should be if you feel unsure, because the top of the seat will always move more than the base.
Check the recline indicator next. The bubble, line, or ball must sit in the range for your child, not just near it.
Check the harness with the pinch test. Buckle your child in, tighten the straps, then try to pinch the strap at the collarbone.
If you can pinch a fold, tighten the harness adjuster until the strap lies flat. Remove bulky coats first, because a thick coat hides slack that appears later.
Check the chest clip position. It should sit at armpit level, centred on the chest, not on the belly or near the neck.
Common Graco install mistakes and quick fixes
A loose base often comes from too little weight during tightening. Put your knee in the seat, lean in, and pull the strap again.
A forgotten top tether often comes from rushing the forward-facing switch. Make the tether a separate step on your checklist, not an afterthought.
A loose harness often comes from a bulky coat or a chest clip set too low. Dress your child in thin layers, then add a blanket over the harness.
Read the common car seat installation mistakes guide if two or more of these sound familiar, because the same errors repeat across brands.
Get a free check from a certified Child Passenger Safety Technician if the seat still moves too much. Consumer Reports and local safety programs list inspection stations, and a short visit can confirm the install.
Section takeaway: Tight at the belt path, level for your child, and snug at the harness. If all three pass, the install is ready for the road.
Frequently Asked Questions About Installing a Graco Car Seat
Can I install a Graco car seat without the base?
Yes, many Graco infant carriers allow a baseless install with a seat belt in a taxi or a second car. Follow the baseless belt path in your manual, lock the belt, and test the one-inch movement before you travel.
Can I use LATCH in the centre seat for a Graco car seat?
Only if both your vehicle manual and your Graco manual allow it. Many cars have no centre LATCH anchors, and borrowing outboard anchors can change the spacing. Use a seat belt install in the centre when in doubt.
How tight should a Graco car seat be?
It should move less than one inch side to side and front to back at the belt path. Test it at the path, not at the top of the seat, because the top will move more by design.
Do I need the top tether for a forward-facing Graco car seat?
Yes, use the top tether for every forward-facing install when your car has a tether anchor. It limits forward head movement, and your Graco manual lists it as part of the forward-facing steps.
Can I install a Graco car seat in a car without LATCH?
Yes, a seat belt install works in any car with a lap and shoulder belt or a lap-only belt in the right position. Lock the belt, thread it through the correct path, and test the tightness as usual.
When should I switch my Graco seat from rear-facing to forward-facing?
Switch only when your child passes the rear-facing height or weight limit on the Graco label. Keep your child rear-facing as long as they fit, because that position protects the head, neck, and spine.
Why does my Graco car seat still move after I tighten it?
Check for a twisted belt, a wrong belt path, or a recline foot that slipped during tightening. Loosen the seat, reset the path and angle, then tighten again with your knee in the seat.
Install your Graco seat once, slowly, and check it twice. The extra ten minutes in the driveway buys a tighter, safer ride every day after that, and a Car and Driver safety review can help you compare seat features before your next upgrade.

Daniel Brooks is an automotive writer and product researcher focused on car accessories, car tech, maintenance, and practical driving guides. At Plug-in Car World, he helps drivers make smarter automotive decisions through honest reviews and research-driven content.