How to Check Car Seat Compatibility With Your Vehicle
Quick Answer
To check car seat compatibility with your vehicle, compare both manufacturers’ instructions, confirm the approved seating positions, and test the installation. The child car seat must fit your child’s size, attach securely using an approved method, and maintain its required position. Follow the NHTSA car seat installation guidelines when checking the final fit.
Six essential compatibility checks
- Vehicle manual: Confirm which seating positions allow child restraints.
- Car seat manual: Check installation methods, restrictions, and child size limits.
- Attachment system: Verify seat belt, LATCH, or ISOFIX compatibility.
- Physical dimensions: Check seat width, depth, recline, and front passenger clearance.
- Secure installation: Confirm movement stays within one inch at the belt path.
- Safety features: Check tether anchors, support legs, airbags, and other restrictions.
Important: If you cannot achieve an installation permitted by both manuals, try another approved seating position or car seat model. Never modify the restraint or vehicle hardware to force compatibility.
Checking car seat compatibility sounds simple until a seat that looks perfect online refuses to install properly in your vehicle. I always recommend checking the actual seating position before trusting a brand’s general fit claims.
A compact sedan, family SUV, and pickup truck can present completely different installation challenges. This guide explains how to check dimensions, attachment systems, vehicle restrictions, and the final installation before you travel with your child.
In This Guide
- What Does Car Seat Compatibility Actually Mean?
- How Do You Check Your Vehicle’s Owner’s Manual?
- How Do You Measure Whether a Car Seat Will Fit?
- How Can You Test Car Seat Compatibility Before Driving?
- Which Types of Car Seats Fit Different Vehicles?
- What Should You Do If a Car Seat Does Not Fit?
- Frequently Asked Questions
What Does Car Seat Compatibility Actually Mean?
Car seat compatibility means a child restraint can be installed and used correctly in a specific vehicle seating position. It also means the restraint accommodates the child’s height, weight, and developmental needs.
Compatibility involves more than fitting between the doors. The car seat must work with the vehicle’s seat cushions, safety belts, attachment hardware, and manufacturer restrictions.
Definition: Vehicle-to-car-seat compatibility is the ability to install a particular child restraint in an approved vehicle seating position while meeting both manufacturers’ instructions and all required safety checks.
Why Does Vehicle Compatibility Matter?
Child restraints rely on correct positioning and secure attachment to manage crash forces. A poorly matched installation may create excess movement or interfere with the restraint’s intended operation.
Even two vehicles from the same manufacturer can have different rear seat contours. Model year changes may also affect attachment points and seating restrictions.
Pay attention to these compatibility factors:
- Seating position: Whether the chosen rear seat location permits your restraint.
- Vehicle seat shape: Whether bolsters, slopes, or cushions interfere with installation.
- Installation hardware: Whether approved seat belt or lower anchor attachments are available.
- Child restraint dimensions: Whether the seat can achieve its required recline and clearance.
- Child fit: Whether the harness or vehicle belt positions correctly on the child.
- Special restrictions: Whether airbags, head restraints, or other components affect installation.
Does a Car Seat Fit Every Vehicle?
No child car seat should be assumed compatible with every vehicle or every seating position. A restraint advertised as having broad compatibility still requires a vehicle-specific installation check.
Some seats work well in an outer rear seating position but cannot install correctly in the center. Others may fit only with the vehicle’s seat belt instead of lower anchors.
A manufacturer’s vehicle compatibility list can help narrow your choices. However, an approved listing does not replace correct installation or checking the exact model and configuration.
The most useful information includes:
- Vehicle make, model, and model year.
- Exact child car seat model and version.
- Permitted seating position and travel direction.
- Allowed installation method.
- Any restrictions involving additional safety features.
Section Takeaway: Compatibility is a relationship between the child, car seat, vehicle, and seating position. A broad fit claim alone cannot confirm safety.
How Do You Check Your Vehicle’s Owner’s Manual?
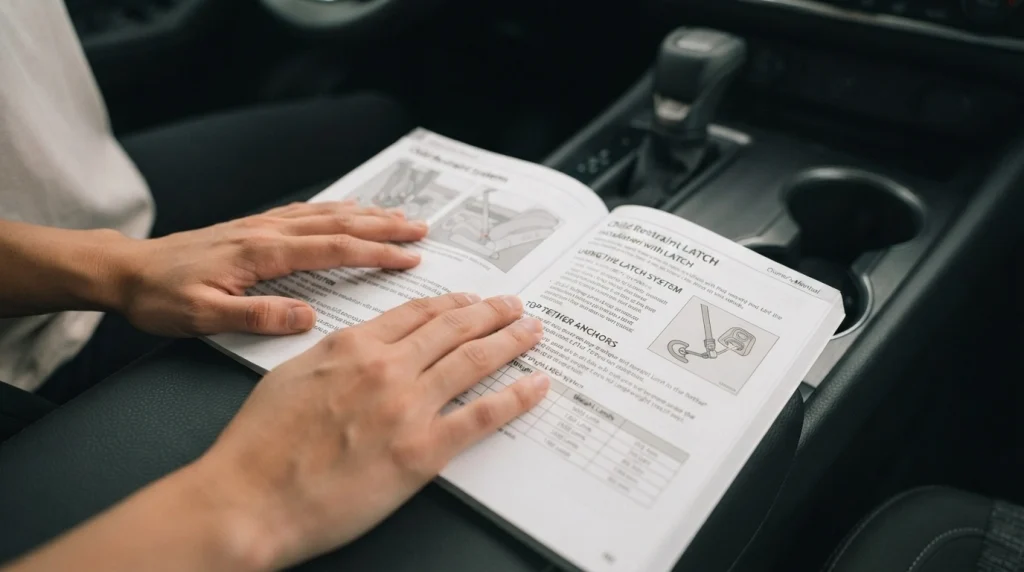
Your vehicle owner’s manual is the first place to check for car seat installation restrictions. Look for sections titled child restraints, child safety seats, seat belts, or LATCH anchors.
You also need the child restraint’s own instruction manual. Both sets of instructions must permit the installation you plan to use.
Step 1: Identify Approved Seating Positions
Check which rear seating positions permit your type of child restraint. Do not assume that every seat with a safety belt allows every car seat design.
Look for specific instructions covering:
- Rear outboard seating positions.
- Rear center seating position.
- Second-row captain’s chairs.
- Third-row seating restrictions.
- Rear-facing and forward-facing installations.
- Restrictions involving folding or adjustable vehicle seats.
The center rear seat can be a good location when installation is permitted and secure. However, a properly installed seat in an approved outboard position is preferable to an insecure center installation.
Step 2: Find Your Vehicle’s Lower Anchors and Tether Anchors
In the United States, LATCH stands for Lower Anchors and Tethers for Children. Lower anchors are metal bars commonly located where the vehicle’s seat cushion meets the seatback.
The top tether anchor is a separate attachment point. Forward-facing harnessed seats generally use it to help limit forward head movement during a crash.
You can review the components in the NHTSA vehicle and car seat parts guide.
For vehicle compatibility, check the following details:
- Which seating positions have dedicated lower anchors.
- Where each approved top tether anchor is located.
- Whether center-position lower anchor use is allowed.
- Whether the child restraint allows that anchor spacing.
- Maximum child weight permitted for lower anchor installation.
Important: Do not borrow the two inner lower anchors from adjacent outboard seats unless both manufacturers explicitly permit the arrangement.
Step 3: Understand Lower Anchor Weight Limits
Lower anchors have weight limits. In many U.S. installations, the combined weight calculation uses a 65-pound limit for the child and car seat.
For example, a 25-pound restraint would leave 40 pounds under that combined calculation. The actual permitted child weight still depends on the car seat label and applicable manufacturer limits.
Once the lower anchor limit is reached, a compatible harnessed seat can generally be reinstalled with the vehicle seat belt. Continue using the forward-facing top tether as directed.
Step 4: Check Seat Belt and Airbag Restrictions
Find out how the vehicle’s seat belt locks for child restraint installation. Some car seats also provide a built-in lock-off mechanism, which must be used according to their instructions.
Never install a rear-facing child restraint in front of an active passenger frontal airbag. An inflating airbag can strike the back of the restraint with dangerous force.
Review any additional instructions about vehicle head restraints, inflatable seat belts, and adjustable seatbacks. These features can change which installation methods are allowed.
Pro tip: If either manual gives unclear instructions, contact the vehicle or child restraint manufacturer. A certified Child Passenger Safety Technician can also help interpret the approved setup.
How Do You Measure Whether a Car Seat Will Fit?
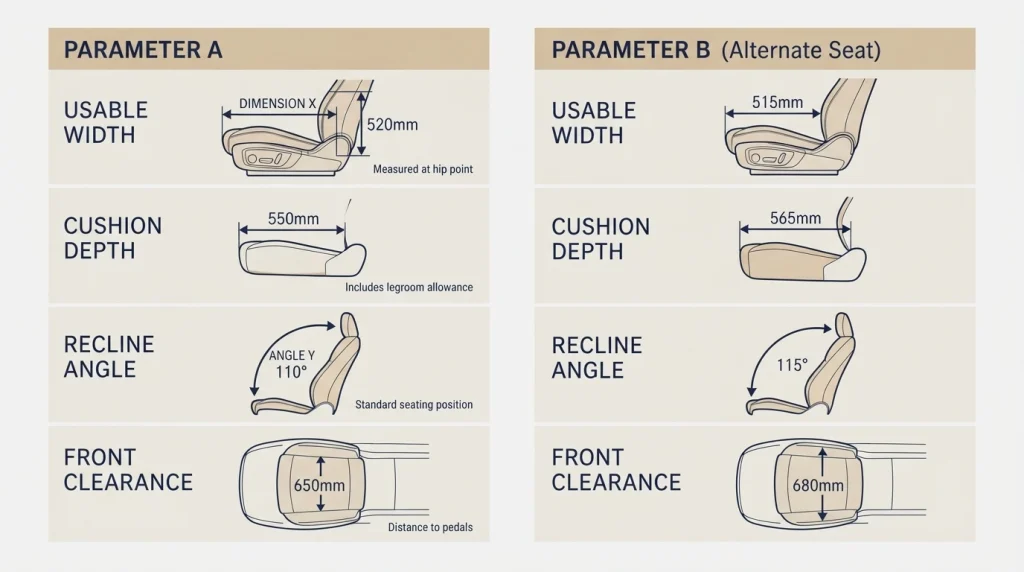
Physical measurements help identify whether a car seat is worth trying in your vehicle. However, published dimensions alone cannot prove installation compatibility.
I prefer to treat measurements as the first screening step. The final decision always comes after a properly performed installation test.
Measure the Vehicle Seating Area
Use a measuring tape to record the available space in your chosen seating position. Measure carefully around armrests, raised cushions, and nearby seat belt buckles.
- Measure usable width: Record the flat seating area available for the car seat.
- Measure cushion depth: Note the distance from the seatback to the front edge.
- Check seat contours: Identify raised bolsters or unusual cushion slopes.
- Check front-seat clearance: Measure the space needed for the restraint’s approved recline.
- Check attachment access: Confirm you can reach the lower anchors or route the seat belt.
- Check nearby hardware: Look for buckle stalks, head restraints, and protruding trim.
When comparing car seats, use the manufacturer’s dimensions for the exact installation configuration. Rear-facing, forward-facing, and fully reclined dimensions may differ.
Check Rear-Facing Car Seat Clearance
Rear-facing car seats often require significant front-to-back space. This can become a challenge in compact cars with limited rear passenger legroom.
The restraint must reach the recline angle specified by its manufacturer. Rear-facing infant seats commonly include a level indicator to help confirm this angle.
Check these common clearance issues:
- Whether the restraint touches the front seat.
- Whether front-seat contact is permitted by both manufacturers.
- Whether the front passenger can maintain a safe seating position.
- Whether the front seat interferes with installing or removing the child restraint.
- Whether any load leg can reach an approved floor location.
A car seat may fit physically but create an unacceptable front-seat arrangement. Try another approved rear position or a more compact restraint instead.
Check Vehicle Seat Support and Overhang
Some child restraints permit limited overhang beyond the front edge of the vehicle cushion. Others require more complete support beneath the restraint or its base.
There is no universal overhang allowance for all car seats. Follow the exact manufacturer’s instructions rather than assuming an 80-percent support rule applies.
Side overhang and placement over raised cushion edges also require attention. A restraint should never be positioned contrary to its approved support requirements.
Check Load Legs and Floor Storage Compartments
Some rear-facing infant seats include a load leg that extends from the base to the vehicle floor. The leg helps manage rotation during a collision when installed correctly.
Not every floor location supports a load leg. Storage compartments, uneven surfaces, and manufacturer restrictions can prevent its use.
If your seat includes a load leg, verify:
- The vehicle permits load leg installation in that seating position.
- The leg reaches the approved floor surface.
- The manufacturer permits installation over any floor storage compartment.
- The load leg’s indicator confirms its required position.
- The leg does not rest on an unapproved support or object.
Do not improvise a support platform under a load leg. Use another approved configuration or contact the manufacturers for guidance.
Can You Fit Three Car Seats Across the Back Seat?
Three-across installations require more than adding together three published seat widths. Each restraint must install independently without interfering with its neighbors.
A narrow restraint may still conflict with a nearby buckle or lower anchor. Seat contours and overlapping restraint shells also affect the available space.
Before buying three seats, confirm:
- All three seating positions permit the proposed restraints.
- Every seat can use its own approved attachment method.
- One installation does not loosen another.
- Required tether anchors are available.
- Harnesses, buckles, and booster seat belts remain accessible.
Try installing each seat separately, then check all three together. Every restraint must remain independently secure after the neighboring seats are installed.
Section Takeaway: Measurements identify likely fit problems, but only a complete installation confirms compatibility. Pay particular attention to recline, support, anchor access, and neighboring seats.
How Can You Test Car Seat Compatibility Before Driving?
A hands-on installation test is the most practical way to confirm whether a child restraint fits your vehicle. Ideally, perform this test before buying or committing to a car seat model.
Some retailers offer suitable demonstration options or return policies. Confirm those arrangements before removing labels or using the product.
Step-by-Step Car Seat Compatibility Test
- Read both manuals: Confirm the restraint, direction, seating location, and installation method are permitted.
- Prepare the seating position: Remove loose items and unapproved accessories from the installation area.
- Position the restraint: Place it in the approved location and set the required recline or configuration.
- Choose one installation method: Use either approved lower anchors or the vehicle seat belt.
- Route the attachment correctly: Use the proper rear-facing or forward-facing belt path and follow the locking instructions.
- Tighten the installation: Apply pressure and remove slack as directed by the restraint manufacturer.
- Attach the top tether: For a forward-facing harnessed seat, use the correct tether anchor as directed.
- Check special features: Confirm any load leg, anti-rebound component, or support requirement is correctly configured.
- Test movement: Check the installation at the belt path, not by pulling on the top of the child restraint.
- Check the final fit: Confirm correct recline, front-seat clearance, belt access, and child harness positioning.
Do not attach both lower anchors and the vehicle seat belt for the same installation unless both manufacturers explicitly allow it. Using extra attachment methods does not automatically improve safety.
How Much Should a Properly Installed Car Seat Move?
A securely installed child car seat should move less than one inch side-to-side or front-to-back when tested at its belt path. That equals approximately 2.5 centimeters.
Use a firm but controlled pull where the installation belt or lower anchor strap passes through the restraint. Movement at the top of a rear-facing seat may be greater and is not the correct location for this test.
If the restraint moves more than one inch, inspect the installation. Common issues include loose straps, incorrect belt routing, and a seat belt that is not properly locked.
How Do You Test a Rear-Facing Installation?
A rear-facing installation must satisfy the restraint’s recline instructions. Check the built-in level indicator while the vehicle is parked on a reasonably level surface.
Then confirm these items:
- The restraint is firmly installed at the correct belt path.
- The recline indicator shows the approved range.
- Any required base or anti-rebound component is correctly positioned.
- The harness slots are at or below the child’s shoulders.
- The harness fits snugly without twists.
- The chest clip sits at armpit level, where applicable.
Rear-facing seats should remain in use until the child reaches the manufacturer’s rear-facing height or weight limit. Do not turn a child forward simply because their legs appear bent.
How Do You Test a Forward-Facing Installation?
Check the correct forward-facing belt path and secure the child restraint using the approved method. Attach and tighten the top tether according to the car seat and vehicle manuals.
The child’s harness straps should generally enter the seat at or above shoulder level. Some restraints have additional rules about which harness slots may be used forward-facing.
Check the restraint’s permitted recline setting, headrest clearance, and the child’s harness fit. Never remove or modify a vehicle head restraint unless the vehicle and child restraint instructions permit the configuration.
What About Booster Seat Compatibility?
Booster seats position the vehicle’s lap-and-shoulder belt correctly on a child. Unlike harnessed car seats, the vehicle belt restrains the child directly.
Check that the lap belt rests low across the upper thighs. The shoulder belt should cross the middle of the chest and shoulder without rubbing the neck or slipping off the shoulder.
The child should also be able to remain seated correctly throughout the trip. Some backless boosters require adequate vehicle head support, while high-back models have their own fit requirements.
Pro tip: If you are uncertain about a movement test, belt route, or tether connection, arrange an inspection with a certified Child Passenger Safety Technician. Do not drive with a child in a restraint you cannot install correctly.
Section Takeaway: The one-inch belt-path test, correct recline, approved attachment method, and proper child fit are essential. Passing only one check is not enough.
Which Types of Car Seats Fit Different Vehicles?
The best child restraint type depends primarily on your child’s size and developmental stage. Vehicle dimensions then help determine which compatible model to choose.
As of 2026, car seat shopping still requires checking both manuals and the specific product. Marketing descriptions such as slim, compact, or universal fit cannot confirm installation compatibility.
Car Seat Type Comparison
| Car Seat Type | Typical Fit Challenge | What to Verify |
|---|---|---|
| Rear-facing infant seat | Recline angle and front-seat clearance | Base fit, recline indicator, and approved support |
| Convertible car seat | Large shell and changing installation positions | Rear-facing and forward-facing requirements |
| Forward-facing harnessed seat | Top tether access and seatback shape | Tether anchor, belt path, and harness fit |
| High-back booster | Headrest interference and belt routing | Shoulder belt guide and head support |
| Backless booster | Vehicle head support and belt geometry | Head restraint height and lap-shoulder belt fit |
Are Compact Cars More Difficult for Car Seats?
Compact vehicles can create challenges with front-seat clearance and narrow rear seating areas. However, a smaller vehicle does not automatically prevent a correct installation.
Look for a restraint that fits within the available space while preserving its approved recline and support. Narrow seat designs may help with multiple restraints, but actual installation remains necessary.
Are SUVs and Minivans Automatically Compatible?
Larger vehicles often offer more passenger space and seating flexibility. Yet some have complicated third-row anchors, adjustable head restraints, or floor storage compartments.
A spacious cabin does not guarantee every seating position supports every car seat. Read the vehicle instructions before choosing a row or installing a load leg.
Can You Install a Child Car Seat in a Pickup Truck?
Pickup compatibility depends heavily on cabin design and the available rear seating positions. Some trucks have limited rear cushion depth or unusual tether routing arrangements.
Check the exact truck owner’s manual, especially for extended-cab configurations. Never assume a small rear seat or front passenger position is suitable for a particular restraint.
What About ISOFIX and i-Size Car Seats?
ISOFIX is an attachment system used in many countries outside the United States. It serves a similar purpose to lower anchor installation, but regional standards and approval rules differ.
Some i-Size restraints are approved for compatible i-Size vehicle seating positions. Other ISOFIX or support-leg combinations require a model-specific compatibility check.
Use the approved restraint and vehicle manuals for your market. Do not assume that a U.S. LATCH approval automatically establishes approval under another country’s system.
For help choosing a restraint based on child size and safety requirements, consult the NHTSA car seat and booster seat guidance.
What Should You Do If a Car Seat Does Not Fit?
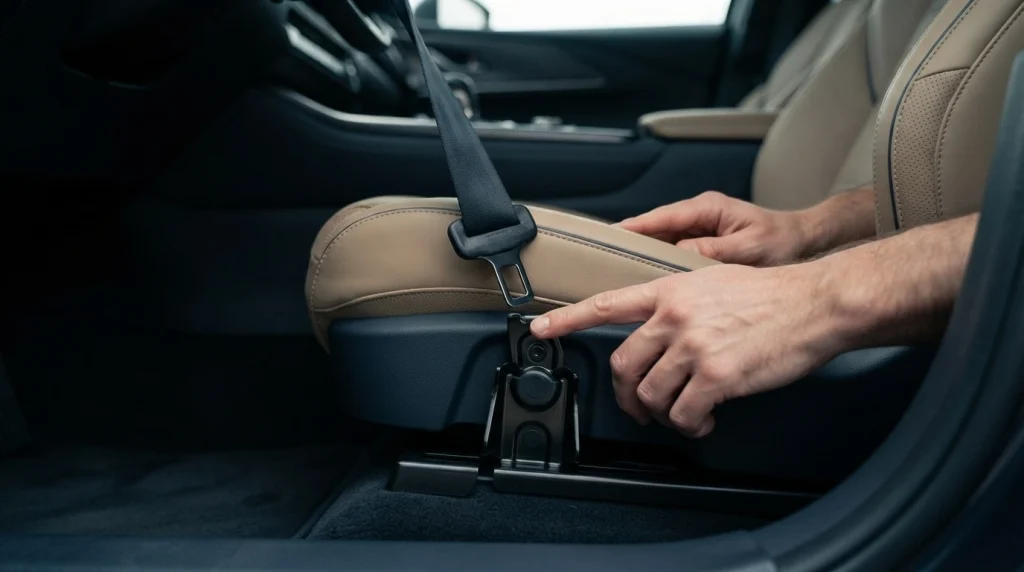
When a child car seat does not install correctly, identify the specific obstacle before changing anything. Many problems involve the selected seating position or installation method rather than the overall vehicle.
Start by checking both manuals again. A manufacturer-approved alternative may solve the problem without purchasing another restraint.
Common Compatibility Problems and Solutions
| Problem | Possible Cause | Recommended Action |
|---|---|---|
| Seat moves over one inch | Loose installation or incorrect belt locking | Reinstall using the approved method and retest |
| Rear-facing seat lacks clearance | Long shell or restricted cabin space | Try another approved position or compatible model |
| Seat belt buckle interferes | Buckle stalk or belt geometry conflicts with restraint | Check permitted adjustments or alternate installation |
| Center LATCH connection unavailable | No dedicated center lower anchors | Use an approved seat belt installation or another position |
| Load leg cannot be positioned | Floor contour or compartment restriction | Consult manufacturer requirements and use approved configuration |
| Booster belt fits incorrectly | Vehicle belt geometry or booster shape | Try another approved position or different booster |
Can You Adjust the Vehicle Seat to Improve Compatibility?
Some vehicle seat adjustments may be permitted, including certain seatback or head restraint positions. Use only configurations approved by both manufacturers.
Do not remove required safety components, alter belt hardware, or add improvised supports. A restraint must fit without unauthorized vehicle or product modifications.
Can Car Seat Covers or Protectors Affect Compatibility?
Yes, some aftermarket seat protectors and covers can interfere with proper child restraint installation. They may alter how the restraint contacts the vehicle cushion or affect the attachment system.
Use only accessories supplied with the child restraint or explicitly approved by its manufacturer. Also check vehicle instructions for any restrictions on seat covers, particularly around seat-mounted airbags.
The American Academy of Pediatrics discusses these issues in its car safety seat guidance for families.
When Should You Choose a Different Car Seat?
Consider another model if your existing restraint cannot meet the required installation conditions. A model with a different shell, base, or belt-routing design may work better.
Replacement may be necessary when:
- No permitted seating position provides a secure installation.
- The required recline cannot be achieved.
- The seat conflicts with essential vehicle safety equipment.
- Required tether or support arrangements cannot be used.
- The child has outgrown the restraint’s height or weight limits.
- The restraint is damaged, expired, recalled without an available remedy, or otherwise unsuitable for continued use.
Do not assume a recalled car seat always requires immediate disposal. Follow the manufacturer’s recall instructions to determine whether repair or replacement is required.
You can check relevant safety actions using the official NHTSA recall lookup.
When Should You Seek Professional Help?
A certified Child Passenger Safety Technician can help resolve difficult fit and installation questions. They can review both manuals and demonstrate how to install the restraint correctly.
Professional help is especially useful for unusual vehicle configurations, three-across arrangements, or repeated installation problems. Ask the technician to teach you how to check the installation yourself.
Pro tip: Never use an unfamiliar anchor point simply because it looks strong. Tether anchors and other restraint hardware must be identified through the vehicle manufacturer’s instructions.
Section Takeaway: Do not force a child restraint to fit. A different approved seating position, installation method, or car seat model is safer than an improvised solution.
Frequently Asked Questions About Car Seat Compatibility
1. How do I know whether a car seat is compatible with my car?
Check your vehicle owner’s manual and the exact car seat manufacturer’s instructions. Confirm the permitted seating position, attachment system, child size limits, and special restrictions.
Then perform a complete installation test. The restraint should remain secure within one inch of movement at the belt path and meet all required positioning instructions.
2. Can any car seat fit in any vehicle?
No, not every car seat works in every vehicle or seating position. Vehicle cushion dimensions, seat belt geometry, anchor locations, and manufacturer restrictions can prevent a proper installation.
A car seat’s general compatibility claim should never replace a check using the exact restraint and vehicle manuals.
3. Is LATCH safer than using a seat belt?
LATCH and vehicle seat belt installations are both designed to secure compatible child restraints safely. Neither method is automatically safer when both are installed correctly.
Choose the manufacturer-approved method that provides a proper installation. Remember that lower anchors have weight limits and forward-facing tether requirements remain important.
4. Can I install a car seat in the middle of the back seat?
Yes, when the vehicle and child restraint manufacturers permit that seating position and you can achieve a secure installation. Many vehicles lack dedicated center lower anchors, but a seat belt installation may be suitable.
A properly installed restraint in an approved outer rear position is preferable to an improperly installed center restraint.
5. How do I know if my rear-facing car seat is too big?
A rear-facing car seat may be unsuitable if it cannot reach its required recline, lacks approved support, or interferes with essential front-seat positioning. Physical width alone does not establish compatibility.
Check the manufacturer’s dimensional and clearance requirements, then test the actual installation.
6. Can I use a car seat protector underneath a child car seat?
Only use a protector if the child restraint manufacturer explicitly permits it. An unapproved accessory may alter the installation or interfere with the vehicle seat.
Also check whether your vehicle manufacturer restricts covers or protectors in that seating position. Never add padding simply to make a loose installation feel tighter.
7. Do I need to check compatibility again when changing vehicles?
Yes. A car seat that installs correctly in one vehicle may not fit another vehicle’s seating geometry or attachment system.
Recheck the manuals, permitted seating position, installation method, recline, and belt-path movement whenever you move a child restraint to a different vehicle.
Final Takeaway: The best car seat for your vehicle is one that fits your child, meets both manufacturers’ instructions, and installs correctly in an approved seating position. The vehicle’s size or a brand’s popularity cannot guarantee compatibility.
Before your next trip, review the manuals and perform the full installation checklist. If anything remains uncertain, get assistance from a certified Child Passenger Safety Technician before traveling with your child.

Daniel Brooks is an automotive writer and product researcher focused on car accessories, car tech, maintenance, and practical driving guides. At Plug-in Car World, he helps drivers make smarter automotive decisions through honest reviews and research-driven content.