
How to Install a Rotating Car Seat? Step-by-Step Guide for Parents
Quick Answer
How to install a rotating car seat? Set the base flat, attach it with LATCH or the seat belt, tighten it until it moves less than one inch, set the recline angle, then rotate the seat toward the door to load your child and lock it back into a rear-facing or forward-facing position before you drive.
Do these steps in order
- Read the manual first: Your seat and your car both set limits for LATCH weight, belt routing, and recline.
- Pick one install method: Use LATCH or the seat belt, never both at the same time unless the manual says so.
- Tighten, then test: Push down hard, pull the slack out, and check for less than one inch of movement at the belt path.
- Lock the rotation: Turn the seat until it clicks and tug it to confirm it cannot spin while you drive.
- Check the harness last: Straps sit flat, the chest clip sits at armpit level, and the pinch test finds no slack.
Before you drive off
- If the seat still wiggles, the angle looks wrong, or the rotation will not lock, stop and redo the install.
A rotating car seat changed how I load my toddler. I used to lean in, twist my back, and wrestle straps in a tight back seat.
Now I turn the seat toward the door, buckle my child in while facing them, and spin it back into place. It sounds simple, and it is once the base is installed right.
This guide walks through the full install in plain steps. You will learn what a rotating seat is, what to check before you start, how to install it with LATCH and with a seat belt, and how to test the rotation lock.
I have installed these seats in a compact sedan, a mid-size SUV, and a minivan. The steps stay the same, but the fit and the legroom change a lot by car.
In This Guide
- What Is a Rotating Car Seat?
- What Do You Need Before You Start?
- How Do You Install a Rotating Car Seat With LATCH?
- How Do You Install a Rotating Car Seat With a Seat Belt?
- How Do You Rotate the Seat and Lock It in Place?
- Rotating vs Standard Convertible Car Seats: What’s Different?
- What Mistakes Should You Avoid After Install?
What Is a Rotating Car Seat?
A rotating car seat is a convertible seat mounted on a base that turns. The shell spins toward the car door so you can load and unload your child while facing them.
Once your child is buckled in, you turn the seat back to rear-facing or forward-facing. A lock clicks when the seat reaches the driving position.
Most rotating seats work rear-facing first, then forward-facing as your child grows. The exact weight and height limits sit on the labels on the side of the seat.
Many models add a load leg, a steel bar that drops from the base to the car floor. It cuts down on forward movement in a crash.
How does the rotation work?
The base stays fixed to the car. The seat shell turns on a ring or a turntable inside that base.
You press a release lever or button, usually on the front or side of the seat. Then you turn the shell smoothly toward the door.
The seat should never stay turned while you drive. It must lock into a rear-facing or forward-facing position first.
Who is a rotating seat best for?
Parents with back pain, tall cars, or tight door openings get the most value. Grandparents who lift a toddler in and out several times a day often notice the difference too.
Pro tip: check the seat manual and the Consumer Reports car seat ratings before you choose a model, and confirm the weight and height limits match your child today, not just next year.
Section Takeaway: A rotating car seat spins toward the door for loading, then locks into a rear-facing or forward-facing position for driving, and the rotation never replaces a tight install or a correct harness fit.
What Do You Need Before You Start?
You need about 30 to 45 minutes for a first install. Rushing this job is how small errors creep in.
Park on flat ground and move the front seats forward. You need room to kneel in the back seat and push down on the base.
Read the car seat manual and the car owner’s manual before you touch a strap. The two books must agree on the seating position and the install method.
Check the seat for recalls first. Pro tip: look up your seat on the NHTSA recall lookup by brand and model, and do not use a seat with an open recall until you follow the fix.
What tools and checks do you need?
- Car seat manual: Keep it open to the install pages while you work.
- Car owner’s manual: Find the LATCH anchor locations and the seat belt locking rules for your car.
- A towel or pool noodle: Use one only if the manual allows it to fix the recline angle.
- Your child, or their current weight and height: You need these numbers to pick rear-facing or forward-facing.
- Clean vehicle seat: Remove loose items, thick seat covers, and anything that stops the base from sitting flat.
Pick the seating position next. The center rear seat is often the safest spot, but many cars have no LATCH anchors there.
An outboard rear seat with LATCH often gives a tighter install than a center seat with a belt. A tight outboard install beats a loose center install every time.
Section Takeaway: A flat spot, both manuals, a recall check, and the right seating position matter more than speed, so sort them out before you tighten anything.
How Do You Install a Rotating Car Seat With LATCH?
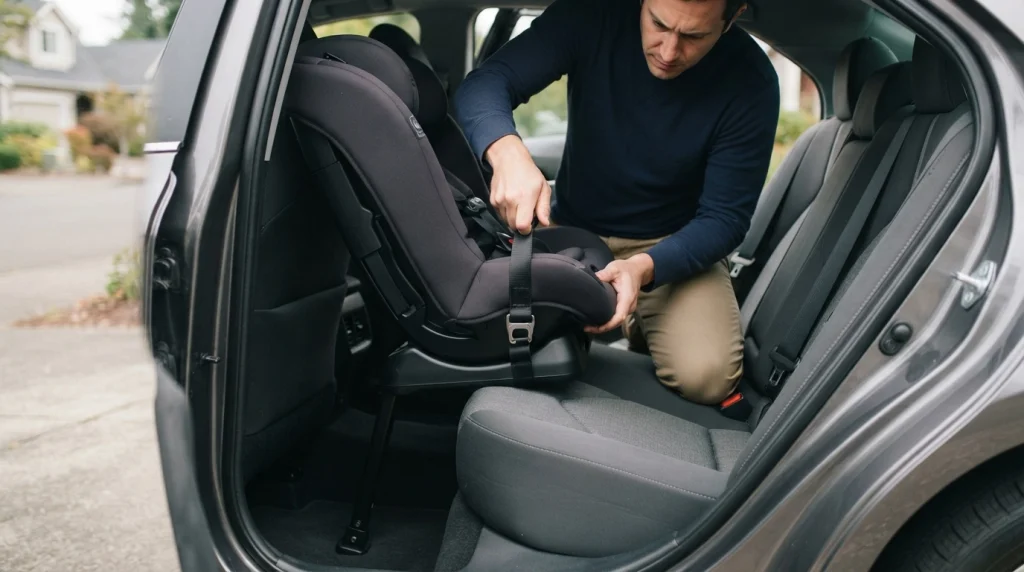
LATCH stands for Lower Anchors and Tethers for Children. It is the pair of metal anchors hidden in the crack of the vehicle seat.
Most rotating seats use LATCH for rear-facing installs up to a set child weight. The manual states that limit, often around 35 pounds for the child plus the seat weight in some cars.
Step 1: Set the base and recline
Place the base on the vehicle seat with the rotation locked in the rear-facing position. Keep the seat facing the back of the car.
Set the recline to the rear-facing range shown on the level indicator. Newborns need a more reclined angle than older toddlers.
Extend the load leg if your seat has one. Adjust it until it touches the floor firmly without lifting the base.
Step 2: Connect the lower anchors
Pull the LATCH straps out and clip each connector onto its anchor. You should hear a click on each side.
Route the straps through the rear-facing belt path only. The forward-facing path sits in a different slot, and using the wrong one changes how the seat moves in a crash.
Step 3: Tighten and test
Kneel in the seat or press down hard with your knee. Push the base into the vehicle cushion while you pull the LATCH strap tight.
Test the install at the belt path. Grip the base near the belt path and push it side to side and front to back.
It should move less than one inch in any direction. If it moves more, tighten again or switch to a seat belt install.
For a forward-facing LATCH install, attach the top tether as well. The tether anchors to a point behind the vehicle seat, and it cuts down on forward head movement.
Learn the full LATCH install steps for your car before you rely on feel alone, because anchor depth and strap routing vary by model.
Section Takeaway: Clip both anchors, tighten from the rear-facing belt path, and pass the one-inch test at the belt path before you touch the rotation lever.
How Do You Install a Rotating Car Seat With a Seat Belt?
A seat belt install works in any rear seating position. It also works when your child is too heavy for LATCH, so most parents need this method sooner or later.
Start the same way as a LATCH install. Set the base flat, pick the right recline, and lock the rotation in the driving direction.
Thread the vehicle seat belt through the correct belt path. Rear-facing and forward-facing use different paths, and the manual shows both with color coding on many seats.
Step 1: Route the belt correctly
Pull the lap and shoulder belt across the seat. Feed it through the belt path and buckle it.
Some rotating seats have a built-in lock-off. It is a clamp that holds the belt tight, and you close it after you remove the slack.
Step 2: Lock the belt and remove slack
Lock the seat belt before you tighten it. Most modern cars lock the belt when you pull it all the way out and let it retract slowly.
Press down on the base with your knee or your full weight. Pull the shoulder belt to take out the slack while you hold that pressure.
Step 3: Test and adjust
Test for less than one inch of movement at the belt path. Use the same grip and the same push as the LATCH test.
For a forward-facing belt install, attach the top tether too. The tether is just as important with a belt as it is with LATCH.
Compare the two methods in the seat belt install guide if your car has both options, because the tighter method for your car is the right one.
Section Takeaway: Route the belt through the correct path, lock it, press the base down hard while you remove slack, and pass the one-inch test before you load your child.
How Do You Rotate the Seat and Lock It in Place?
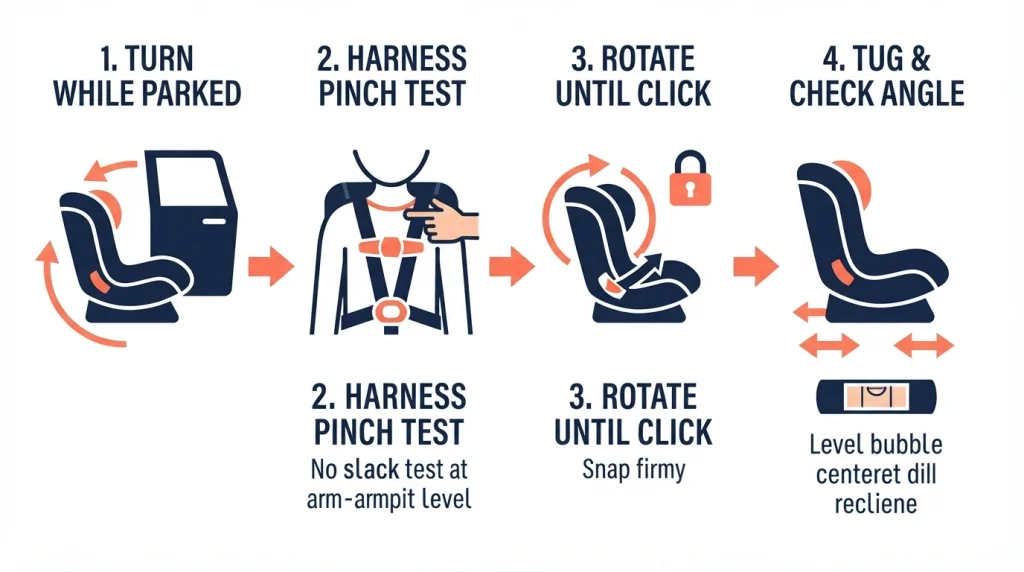
Rotation is the easy part, but it is also the part parents forget to double-check. A seat that is not locked can turn during a sudden stop.
Only rotate the seat when the car is parked. Never try to turn it while you drive, even at low speed.
Press the release lever or button and turn the shell slowly toward the door. Stop when it reaches the loading position and let it settle.
How do you load your child in the turned position?
Place your child in the seat while it faces the door. Buckle the harness and tighten it before you rotate the seat back.
Do the pinch test on the harness. Try to pinch a fold of strap at the collarbone, and if you can grab one, tighten the harness more.
How do you lock it back for driving?
Turn the shell back toward the front or rear of the car. Listen for the click that tells you the lock has engaged.
Tug the seat side to side to confirm it cannot rotate. It should feel fixed, with no spin and no wobble.
Confirm the recline angle one more time. Rotating the seat can shift the angle slightly, so check the level bubble or line.
Use the installation angle check after every reinstall, because a wrong angle can tip a newborn’s head forward and narrow the airway.
Section Takeaway: Load with the seat turned toward the door, buckle and tighten first, then rotate back until it clicks and tug it to prove it cannot spin.
Rotating vs Standard Convertible Car Seats: What’s Different?
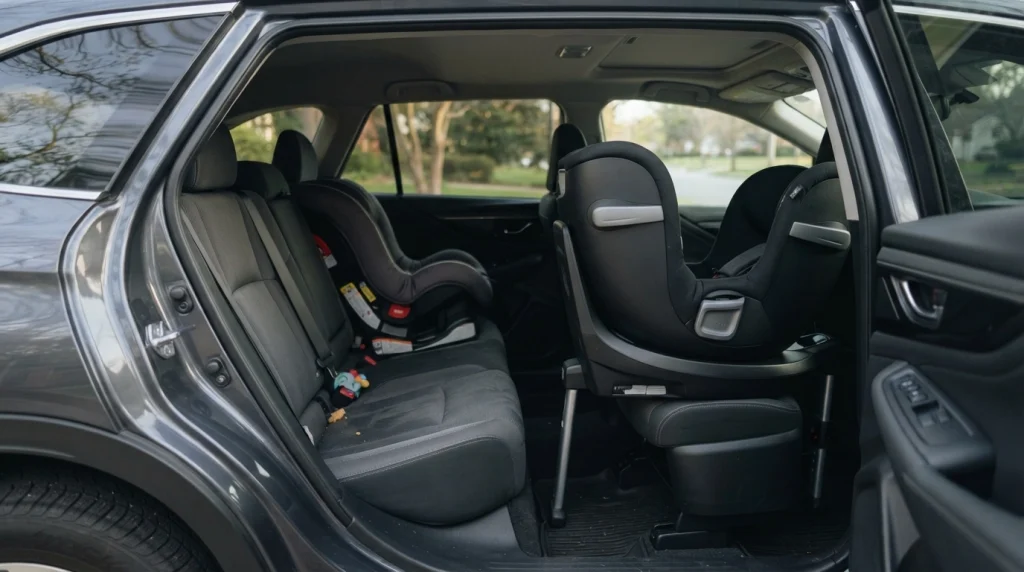
A rotating seat and a standard convertible seat protect a child the same way. Both use a harness, a shell, and a tight install to hold the child in a crash.
The difference is access, size, and cost. A rotating seat makes loading easier, but it takes up more space and it usually costs more.
| Feature | Rotating car seat | Standard convertible seat |
|---|---|---|
| Loading | Turns toward the door, easier on your back | Fixed position, you lean in to buckle |
| Size and weight | Heavier base, deeper footprint | Lighter, often fits tighter spaces |
| Install method | LATCH or seat belt, plus load leg on many models | LATCH or seat belt, load leg less common |
| Rear-facing limits | Similar limits, check the label | Similar limits, check the label |
| Best for | Back pain, tall cars, frequent loading | Small cars, tight budgets, travel |
Choose a rotating seat if loading hurts your back or your car door opening is tall and wide. Choose a standard seat if space is tight or you move the seat between cars often.
Check Edmunds and your car manual for rear legroom figures, because a rotating base can push the front seat forward by several inches.
Read the infant vs convertible comparison if you are still deciding when to move out of an infant carrier, because a rotating seat replaces the convertible stage, not the infant carrier stage for most families.
Section Takeaway: A rotating seat wins on loading comfort, a standard convertible wins on size and price, and both are safe only when the install is tight and the harness fits.
What Mistakes Should You Avoid After Install?
The first error is driving with the seat still turned. Always check the lock click before you start the car.
What else should you check each week?
- Movement: Test the one-inch rule at the belt path after long trips and after cleaning the car.
- Recline: Check the level indicator when your child grows or when you move the seat.
- Harness height: Rear-facing straps sit at or below the shoulders, forward-facing straps sit at or above them.
- Load leg: Confirm it still touches the floor after you adjust the front seats.
- Expiry and damage: Check the expiry date on the label and replace the seat after a moderate or severe crash.
Get a free check if you are unsure. Pro tip: book a check with a certified child passenger safety technician through Car and Driver safety guides or your local inspection station, and bring both manuals with you.
Run the installed correctly check after any reinstall, because a seat that felt tight yesterday can loosen after you clean the vehicle seat or move the front seats.
Section Takeaway: Never drive unlocked, never combine LATCH and belt unless the manual allows it, and recheck movement, angle, and harness fit every time you reinstall or your child grows.
Frequently Asked Questions
Can you install a rotating car seat with a seat belt?
Yes, you can install most rotating seats with a seat belt. Route the belt through the correct belt path, lock the belt, press the base down, and test for less than one inch of movement.
Do rotating car seats need a load leg?
Not all of them need one, but many models include a load leg. If your seat has one, use it and adjust it until it touches the floor firmly without lifting the base.
Can you rotate the seat while driving?
No, never rotate the seat while driving. Only turn it when the car is parked, and lock it back into a rear-facing or forward-facing position before you drive.
Are rotating car seats safe for newborns?
Some rotating seats fit newborns with the infant insert in place, but many fit better from a few months old. Check the minimum weight, the harness height, and the recline angle for your baby.
How long does it take to install a rotating car seat?
A first install takes about 30 to 45 minutes. Later installs in the same car take about 15 to 20 minutes once you know the belt path and the recline setting.
Will a rotating car seat fit in a small car?
It can fit, but legroom gets tight fast in a small car. Measure the base depth, test the front seat position, and try the seat in your car before you buy if you can.
As of 2026, rotating seats keep getting lighter and easier to turn, but the safety rules have not changed. A tight install, a correct angle, and a snug harness still matter more than the spin.
If this install still feels loose or the rotation will not lock, get it checked before your next trip. A ten-minute check beats a week of worry, and it beats finding the problem on the road.

Daniel Brooks is an automotive writer and product researcher focused on car accessories, car tech, maintenance, and practical driving guides. At Plug-in Car World, he helps drivers make smarter automotive decisions through honest reviews and research-driven content.