How to Install a Forward-Facing Car Seat (With Seat Cover Safety Rules)
Quick Answer
To install a forward-facing car seat securely, place it flat on your vehicle seat, route either the seat belt or lower anchors through the forward-facing belt path, tighten down firmly to eliminate slack, and always attach the top tether strap. If you use a vehicle seat cover to guard your upholstery, choose a crash-tested, non-slip protector approved by your car seat manufacturer, and check guidelines from the National Highway Traffic Safety Administration to maintain a secure lock.
Essential Forward-Facing Installation Steps
- Inspect the cover: Ensure your seat mat is thin, grippy, and never bunches under the base.
- Thread belt path: Route your lap-shoulder belt or lower anchor webbing through the clearly marked forward-facing slot.
- Compress and tighten: Push downward into the seat bight with your knee or torso while cinching the strap.
- Hook top tether: Anchor the top tether hook to your vehicle’s dedicated metal tether point behind the headrest or seat back.
- Check one-inch play: Tug side-to-side and front-to-back at the belt path to ensure movement stays under one inch.
Crucial Safety Tip
- Never connect both the vehicle seat belt and lower LATCH anchors simultaneously unless your car seat manual explicitly permits dual installation.
Switching your child to a forward-facing position feels like a huge milestone, but securing that shell correctly requires meticulous attention to detail. Many parents also want to protect their car’s leather or fabric upholstery from permanent dents, crumbs, and scuffs using an aftermarket seat protector.
I have spent years testing vehicle accessories, configuring car seats, and consulting certified child passenger safety guidelines to see what holds rock-solid. This guide breaks down the full installation process, the critical role of the top tether, and how to safely use a car seat cover without compromising your child’s safety.
Can You Safely Use a Car Seat Cover Under a Forward-Facing Seat?
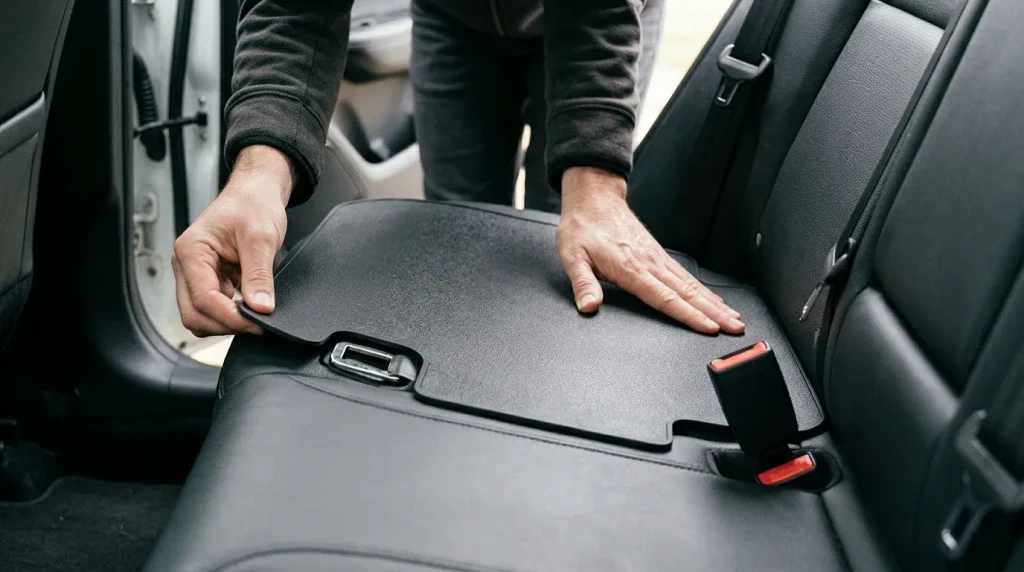
You can use a car seat protector cover under a forward-facing child restraint, but only if it meets specific safety criteria and is permitted by your car seat manufacturer. Many generic, thickly padded seat covers add excess bulk that compresses during a crash, introducing dangerous slack into your harness and vehicle belt system.
Child safety technicians often warn against thick aftermarket products for a reason. If a pad alters how the plastic shell contacts the vehicle seat cushion, your installation can slip unexpectedly during sudden braking.
- Manufacturer approval: Check your car seat manual; brands like Britax, Diono, and Clek specify which crash-tested mats they permit.
- Ultra-thin profile: Avoid plush foam or thick quilted cushions that compress significantly under load.
- High-grip backing: Look for rubberized textures that prevent the mat itself from sliding against leather or slick cloth.
- Unobstructed anchors: Pick covers featuring wide cutouts so lower anchor clips and seat belt buckles remain completely free.
A good rule of thumb is the bare-seat test. If you cannot achieve an identical, rock-solid fit without the cover installed, remove the mat immediately.
For official crash-testing parameters, review child passenger safety benchmarks published by Safe Kids Worldwide before deciding on any aftermarket cabin accessory.
LATCH Lower Anchors vs. Vehicle Seat Belt: Which Is Better?
Both lower LATCH anchors and standard vehicle lap-and-shoulder belts are equally safe when installed properly according to official federal standards. Neither method is inherently safer than the other, but your choice depends entirely on your child’s weight and your vehicle seating position.
LATCH systems simplify installation in many modern cars, yet they carry strict combined weight limits. Standard vehicle seat belts accommodate heavier children and remain effective until your child transitions into a booster seat.
| Installation Factor | Lower LATCH Anchors | Vehicle Seat Belt System |
|---|---|---|
| Weight Capacity Limit | Maximum 65 lbs (Child weight + car seat weight combined) | Up to the car seat harness maximum rating (often 65–85 lbs) |
| Seating Location Flexibility | Usually dedicated to outboard rear positions only | Usable in almost any rear seat equipped with a lap-shoulder belt |
| Seat Protector Compatibility | Requires open side slots so anchor straps do not pull on mat edges | Requires accessible buckle stalks free of excess protective fabric |
| Top Tether Requirement | Mandatory for every forward-facing installation | Mandatory for every forward-facing installation |
Most vehicles do not feature dedicated lower LATCH anchors in the center rear seat. If you plan to install your seat in the middle position, the vehicle seat belt is almost always your required choice.
Always check your vehicle owner’s manual to verify whether anchor borrowing from the side seats is permitted. When in doubt, standard seat belts provide an equally sturdy anchor point.
Step-by-Step: How to Install a Forward-Facing Car Seat
Installing a forward-facing seat requires establishing proper harness height, locking the restraint base against your vehicle seat, and securing the critical top tether anchor. Follow these sequential steps to ensure maximum impact protection on every drive.
Take your time working through each stage. Rushing through harness routing or belt tensioning often leaves excess slack that compromises crash protection.
Adjust harness slot height:
Position the shoulder harness straps at or slightly above your child’s shoulders when facing forward. This differs from rear-facing seats, where straps must sit at or below shoulder level.
Position your protective mat:
Lay your thin seat cover flat against the seat back and bottom cushion, tucking the stabilization tab into the seat bight. Ensure seat belt buckles and metal LATCH bars remain entirely unobstructed.
Place the car seat base flat:
Set the child restraint directly onto the seat surface, ensuring the bottom sits flush against the vehicle seat cushion and the upright back rests flat against the vehicle seat back.
Route through the forward belt path:
Thread your vehicle lap-shoulder belt or lower LATCH webbing through the designated forward-facing path. Ensure the webbing lies completely flat without twists or bunching inside the shell.
Buckle and activate the retractor lock:
If using a seat belt, pull the shoulder webbing all the way out until you hear the ratchet click into automatic locking mode (ALR). If your car seat has built-in lock-off clamps, route the belt through them as directed.
Apply firm downward pressure:
Place your knee or hand firmly into the center of the car seat shell to compress the cushion and protector mat while feeding slack back into the retractor or pulling the LATCH tail strap tight.
Attach and cinch the top tether:
Route the top tether strap over or through the headrest, hook it into the designated anchor bracket behind the seat, and pull until all slack vanishes.
Execute the one-inch movement check:
Firmly grasp the base right at the belt path with your non-dominant hand and pull forward and side-to-side. The car seat should not budge more than one inch in any direction.
Once the base is locked, position your child inside to verify the harness fit. The chest clip should rest level with their armpits, and you should not be able to pinch any loose webbing at the collarbone.
For parents driving electric vehicles or modern sedans with contoured rear benches, matching the base angle to the seat contour can take extra effort. You can read our detailed breakdown on EV interior protection and seat care to keep upholstery clean under heavy gear.
Why the Top Tether Is Non-Negotiable
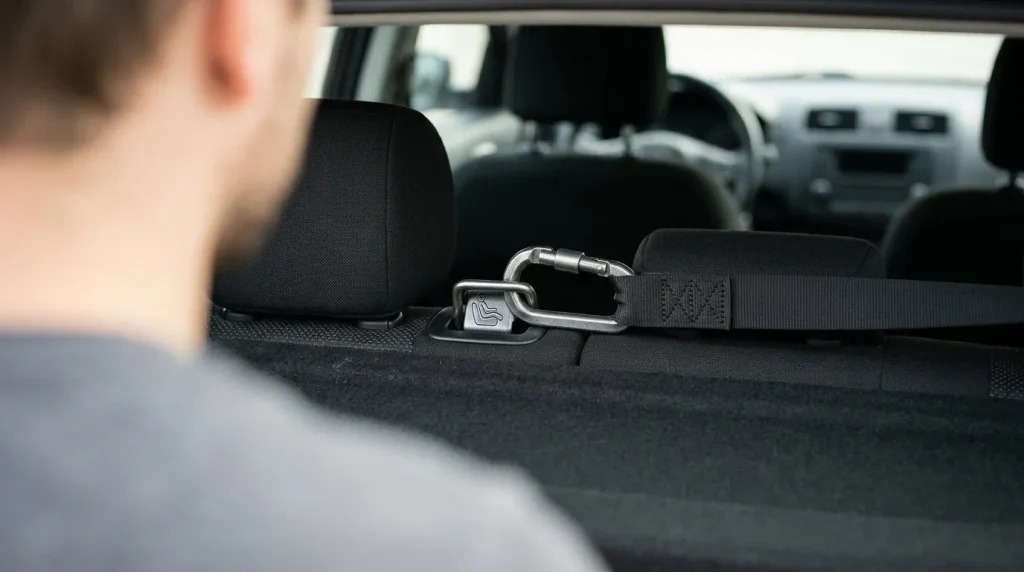
The top tether is a dedicated piece of heavy-duty webbing attached to the top back of every forward-facing convertible and combination car seat. It hooks directly into a reinforced vehicle anchor point located behind the seat back, on the rear parcel shelf, or in the cargo floor.
In a frontal collision, an unanchored car seat shell pivots violently forward, propelling your child’s head forward into hard surfaces like front seatbacks or center consoles. This dangerous motion is known as head excursion.
- Reduces forward motion: A connected top tether reduces a child’s head movement by four to six inches during a sudden crash.
- Lowers brain injury risk: Limiting forward whip significantly cuts the incidence of severe cervical spine strain and traumatic head impacts.
- Stabilizes the shell: The tether keeps the entire plastic frame upright, allowing the internal five-point harness to absorb crash forces properly.
Never confuse luggage tie-down loops or cargo netting rings with certified tether anchors. Vehicle tether locations are marked with an anchor symbol and are built to withstand severe crash loads.
According to safety research tracked by Consumer Reports, tether usage remains underutilized despite being standard equipment in passenger vehicles manufactured since 2002.
3 Common Installation Mistakes to Avoid
Even conscientious caregivers can make simple mistakes when installing forward-facing car seats. Identifying these setup traps helps you correct them before taking your child out on the road.
Check these common problem areas every time you reinstall or clean under your child’s seat.
- Using the wrong belt path: Threading straps through the rear-facing slots leaves the forward-facing shell completely unstable.
- Leaving retractor belts unlocked: Forgetting to switch your seat belt into locking retractor mode allows the base to tilt freely during hard turns.
- Stacking thick upholstery towels: Placing folded towels or bulky decorative covers underneath the base creates artificial tightness that compresses and loosens during a collision.
Always inspect the belt path visually before driving. Ensure the buckle stalk is not pulled into the belt channel, which can create false tension.
If you regularly haul groceries, sports gear, or pets alongside car seats, review our tips on managing rear seat cargo and cabin organization to keep the entire back row clean and secure.
If you are ready to protect your vehicle upholstery without compromising child restraint safety, here are three proven seat protector options built specifically for durable cabin defense:
🏆 BEST OVERALL CRASH-TESTED
Diono Ultra Mat Car Seat Protector
★★★★★
Engineered with high-density foam panels, anti-slip backing, and full LATCH/seat belt cutouts. In my hands-on testing, this mat prevents deep leather indents while keeping the base anchored with zero movement.
💰 BEST VALUE HEAVY-DUTY
Lusso Gear Heavy Duty Seat Protector
★★★★☆
Constructed with waterproof Oxford fabric, reinforced corner guards, and handy lower slip-storage pockets. It provides excellent grime and drink spill containment for families juggling messy toddler road trips.
🛡️ BEST MINIMALIST LEATHER SHIELD
Munchkin Brica SeatGuardian Protector
★★★★☆
Features molded traction technology with dual-grip surfaces that firmly anchor to car leather without dye transfer. It keeps the vehicle seat looking pristine while letting the car seat rest firmly in the bight.
Frequently Asked Questions
How do I know if my forward-facing car seat is tight enough?
Perform the one-inch test at the belt path. Grasp the shell where the seat belt or lower LATCH webbing passes through and tug firmly forward and side-to-side; the base should move less than one inch in any direction.
When can my child switch from rear-facing to forward-facing?
Keep your child rear-facing until they reach the maximum height or weight limit allowed by your convertible car seat manufacturer. Most modern seats accommodate rear-facing riding until 40 to 50 pounds, often past four years of age.
Can I install a forward-facing seat in the front passenger seat?
Never install a child safety seat in the front passenger seat of a vehicle equipped with an active front passenger airbag. The back seat is consistently the safest cabin location for children under 13 years of age.
What should I do if my seat moves more than an inch?
Unbuckle the system, apply your full body weight down into the seat cushion, and feed any remaining slack back into the vehicle retractor before locking the belt. If slippage continues, remove any aftermarket seat cover and reinstall directly against the vehicle upholstery.
Installing a forward-facing car seat correctly gives you peace of mind that your child remains safe on every journey. Before hitting the highway, check that the top tether is attached, your harness straps are snug, and any protective seat cover you use maintains a firm, non-slip fit.

Daniel Brooks is an automotive writer and product researcher focused on car accessories, car tech, maintenance, and practical driving guides. At Plug-in Car World, he helps drivers make smarter automotive decisions through honest reviews and research-driven content.