How to Put on a Tight Steering Wheel Cover (Easy Methods)
Quick Answer
To put on a tight steering wheel cover, you need to soften the inner rubber or vinyl core using heat (either by leaving it in direct sunlight or warming it gently with a hairdryer). Start by hooking the top of the cover over the top of the steering wheel, work your way down both sides simultaneously with equal tension, and use your body weight or leverage to stretch the final stubborn bottom section into place.
Why Steering Wheel Covers Are Designed So Tightly
When you first unpack a new steering wheel cover, it often looks impossibly small compared to your vehicle’s steering wheel. This is not a manufacturing defect; it is a vital safety requirement. A steering wheel cover must fit with extreme tension so that it never slips, shifts, or rotates independently around the steering wheel rim while you are driving.
If a cover were loose enough to slip on effortlessly with zero resistance, it would pose a severe safety hazard during emergency maneuvers, sharp turns, or sudden steering corrections. Manufacturers deliberately engineer the inner core—usually constructed from heavy-duty rubber, TPE, or stiff synthetic polymers—to be slightly smaller than standard wheel diameters. Understanding this tension helps explain why brute force alone usually fails, whereas proper technique and thermal expansion succeed.
Furthermore, different steering wheel diameters and thicknesses vary across vehicle makes and models. A cover labeled as “universal” must span a range of sizes, often leaning toward the tighter end of that spectrum to accommodate slimmer steering wheels securely. Recognizing that resistance is normal will save you from frustration and prevent accidental damage to your steering wheel leather or the cover itself during installation.
The Role of Temperature in Successful Installation
Temperature is the single most important variable when installing a tight steering wheel cover. Materials like rubber and synthetic leather contract and stiffen significantly in cooler environments. If you attempt to stretch a cold steering wheel cover inside a shaded garage or during chilly weather, the inner lining will resist yielding, making the installation nearly impossible and increasing the risk of tearing the seams.
Conversely, heat causes polymer chains within rubber and flexible plastics to become pliable and elastic. Raising the temperature of the cover allows it to expand by a fraction of an inch, which provides just enough give to slip over the outer rim of the wheel. Professional detailers and experienced installers almost always rely on thermal conditioning before attempting any tight interior trim installation.
There are two primary ways to introduce controlled heat: natural sunlight or artificial heat sources. Choosing the right method depends on your current environment, weather conditions, and available tools. Taking ten minutes to properly condition the material beforehand transforms a grueling struggle into a smooth, manageable process.
Method 1: The Sunlight and Warmth Technique
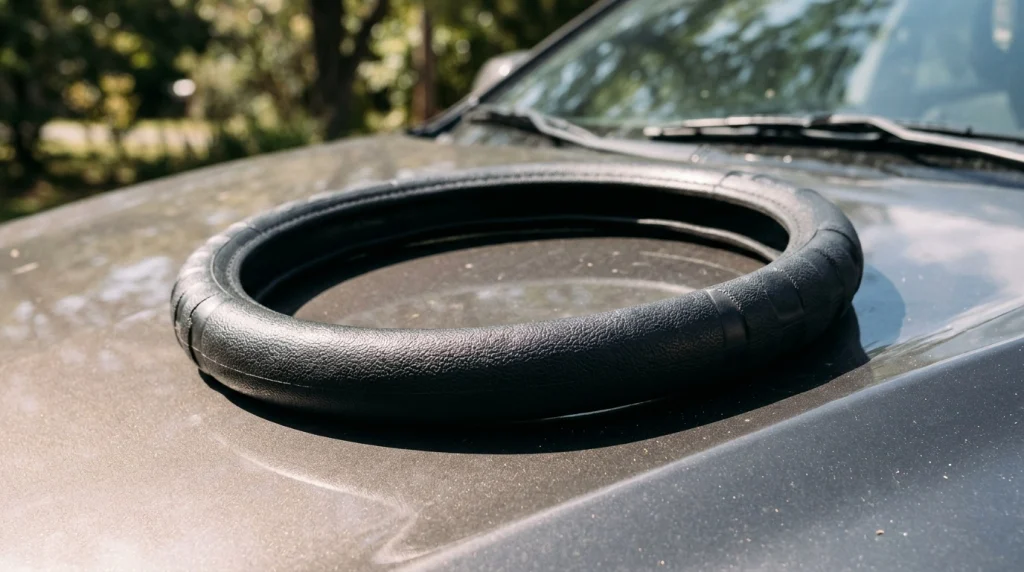
The easiest, safest, and most natural way to soften a stiff steering wheel cover is to harness solar thermal energy. This method requires zero active equipment and eliminates any risk of scorching delicate synthetic leather or melting rubber linings through localized overheating.
To use this approach, take your steering wheel cover outdoors before installation. Place it directly in the path of bright, direct sunlight—either on a clean outdoor table, the hood of your car, or the parcel shelf inside your vehicle where sunlight beams through the windshield. Let it bake for 15 to 30 minutes.
As the cover absorbs solar heat, periodically check its flexibility. You will notice the inner rubber ring becoming noticeably softer, more rubbery, and easier to flex in your hands. Once it reaches a warm, pliable state, bring it inside your vehicle immediately and begin the installation process before the material has time to cool down and re-stiffen.
Tip
If the weather outside is cold or overcast, you can park your vehicle in direct sunlight with all the windows rolled up for an hour before starting. This pre-warms the car cabin and keeps the steering wheel itself at a warmer baseline temperature.
Method 2: The Hair Dryer or Heat Gun Alternative
If you live in a colder climate, lack direct sunlight, or need to complete the installation immediately, artificial heat sources provide a reliable backup. A standard household hair dryer works exceptionally well for this purpose, providing gentle, controllable warmth across the entire inner lining.
Plug in your hair dryer and set it to medium or high heat. Hold the nozzle approximately six to eight inches away from the inner rubber lining of the cover. Keep the dryer moving continuously in a sweeping motion around the entire circumference to distribute the heat evenly. Avoid holding the nozzle in one spot for too long, as excessive localized heat can melt synthetic backing materials or warp decorative stitching.
If you choose to use a professional heat gun, exercise extreme caution. Heat guns reach much higher temperatures than hair dryers and can easily damage automotive vinyl or leatherette. Always keep a heat gun on its lowest setting and maintain a safe distance.
After heating the cover for three to five minutes, test the flexibility with your fingers. It should feel warm to the touch and bend readily. Proceed directly to the installation steps while the material retains its thermal pliability.
Step-by-Step Guide to Installing Your Steering Wheel Cover
With your cover properly warmed and pliable, you are ready to mount it onto the steering wheel. Working systematically ensures that tension remains balanced across the rim, preventing the cover from slipping out of place mid-installation.
- Clean the steering wheel rim: Wipe down your steering wheel with a damp microfiber cloth to remove dust, oils, or residue that might create friction or cause the installed cover to shift later.
- Align the top center: Identify any front-and-back orientation markers, logos, or seam alignments on your cover. Center the top inside edge of the cover over the 12-o’clock position of your steering wheel.
- Anchor the upper section: Press the inner rubber lip over the top rim of the steering wheel so that it hooks securely in place. Hold this top section firmly with one hand.
- Work outward and downward: Using your other hand, pull the cover downward along the right and left sides simultaneously. Stretch the material incrementally, feeding the inner lip over the outer edge of the wheel moving from the top toward the 9-o’clock and 3-o’clock positions.
- Tackle the final bottom section: As you reach the bottom 6-o’clock position, the remaining portion of the cover will feel the tightest. Hook one side of the lower corner firmly onto the wheel rim.
- Leverage the final stretch: Place your thumbs or the palms of your hands against the stubborn remaining section. Pull downward and outward with steady body weight until the final lip snaps securely over the bottom rim.
Common Mistakes to Avoid During Installation
When faced with a stubborn steering wheel cover, it is easy to make hasty mistakes that damage your vehicle interior or injure your hands. Being aware of these pitfalls ensures a smooth, damage-free installation process.
Warning
Never use sharp metal tools like screwdrivers, pry bars, or box cutters to lever the cover onto the wheel. A sharp metal edge can easily puncture the steering wheel leather, slice through the new cover, or accidentally deploy the airbag mechanism in older vehicles.
Another common mistake is attempting to install a cold cover straight out of package shipping boxes during winter temperatures. Cold polymer offers virtually no elasticity, leading to torn inner rings and strained wrist muscles. Always prioritize warming the material first.
Avoid pulling exclusively on one side of the cover while working your way around the wheel. If you stretch one side completely while leaving the other loose, the tension becomes uneven, making the final quarter impossible to close. Always maintain balanced, symmetrical progress down both the left and right flanks.
Post-Installation Check and Adjustments
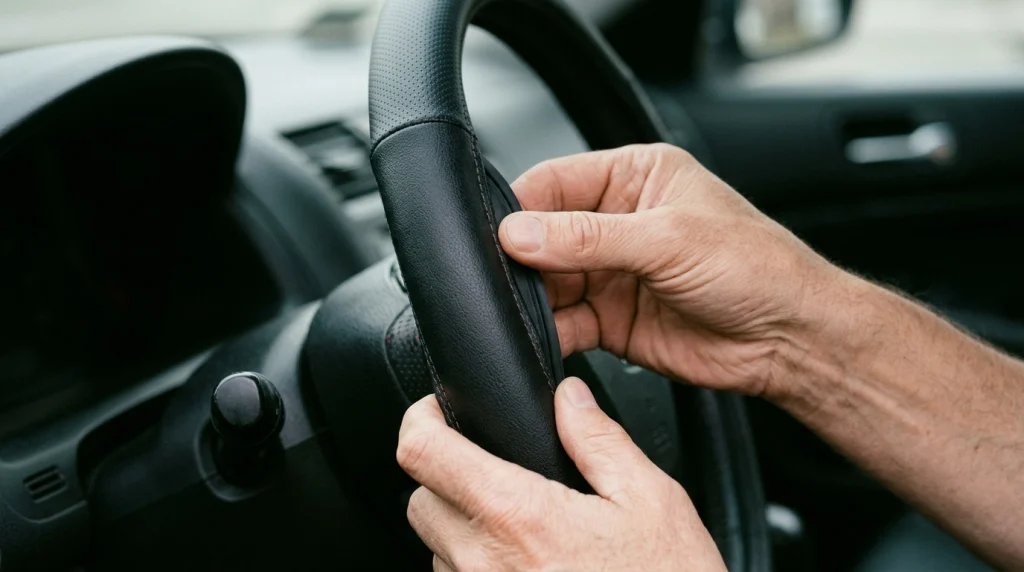
Once the entire cover is successfully seated around the rim, take a moment to inspect your work and ensure proper alignment. A rushed installation can leave certain sections pinched or unevenly stretched.
Run your hands completely around the circumference of the steering wheel. Check that the inner rubber lining is fully seated over the back lip of the wheel across all 360 degrees. If any section appears tucked under or folded improperly, use your fingers to gently massage and roll the edge outward until it sits flush.
Finally, perform a safety check by gripping the steering wheel firmly and attempting to twist or rotate the cover independently of the steering column. A properly installed tight cover should remain completely stationary with zero slippage. If it rotates freely, remove it and re-evaluate whether the underlying wheel diameter matches the cover specifications.
Related Product
Automotive Interior Cleaning and Grip Care Supplies
Keep your steering wheel clean and maintain a slip-free grip surface before installing your protective cover.
As an Amazon Associate, we earn from qualifying purchases.
Frequently Asked Questions
What should I do if the cover is still too small after warming it?
If heating the cover in the sun or with a hairdryer does not provide enough stretch, the cover may be sized for a smaller steering wheel category (such as a 14.5-inch cover on a 15.5-inch wheel). Double-check the packaging and vehicle measurements to ensure correct sizing before applying extreme force.
Can I use lubricant like soap or water to help slide it on?
It is strongly discouraged to use liquid lubricants, soapy water, or oils on a steering wheel cover. Lubricants make the inner lining slippery, which compromises the secure grip required for safe driving and can cause the cover to shift dangerously while turning.
Is it normal for a new steering wheel cover to feel extremely tight?
Yes. Brand-new covers are intentionally manufactured with tight tolerances to account for normal material stretching over time and to guarantee a secure, non-slip friction fit against the steering wheel rim.
How long does it take for a tight cover to settle into place?
Once installed, a tight cover typically conforms fully to the exact shape and contours of your steering wheel within 24 to 48 hours, especially when exposed to warm cabin temperatures while parked.
What tools are safe to use if my hands get tired?
If you need extra leverage without risking interior damage, you can wear thick rubber grip gloves to protect your hands and improve your traction while pulling the final section into place. Never use metal screwdrivers or sharp levers.
Will leaving the cover in the sun damage the material?
Briefly warming a cover in the sun for 15 to 30 minutes is completely safe and beneficial. However, leaving synthetic leather or vinyl covers baking in extreme midday summer heat for hours unattended can cause premature fading or degradation.
Conclusion
Installing a tight steering wheel cover does not have to be a frustrating battle against rigid rubber and inflexible materials. By understanding that tight tolerances are engineered for safety, preparing the cover with controlled heat, and working systematically from top to bottom, you can achieve a secure, professional-grade fit in minutes. Take your time, avoid sharp tools, and enjoy a refreshed, comfortable driving grip.

Daniel Brooks is an automotive writer and product researcher focused on car accessories, car tech, maintenance, and practical driving guides. At Plug-in Car World, he helps drivers make smarter automotive decisions through honest reviews and research-driven content.