How Does a Seat Belt Lock for Car Seat Installation?
Quick Answer
A seat belt locks for car seat installation by preventing the lap portion from loosening during normal driving. Many vehicles use a switchable locking retractor, activated by pulling the belt completely out and feeding it back in, while others use a locking latch plate or an approved car seat lock-off, as explained in NHTSA’s car seat installation guidance.
Quick Steps for a Switchable Retractor
- Check both manuals: Confirm the required installation and locking method.
- Route the belt: Thread it through the correct car seat belt path and buckle it.
- Activate the lock: Slowly pull the shoulder belt completely out of its retractor.
- Remove slack: Feed the belt back while pressing the car seat firmly into the vehicle seat.
- Test the installation: Check for no more than one inch of movement at the belt path.
Important Safety Reminder
- Not every belt locks this way: Follow your vehicle and car seat manuals rather than assuming every retractor switches into locking mode.
If you’ve ever installed a child safety seat and wondered why the seat belt keeps sliding, you’re not alone. The confusing part is that a belt can lock during sudden braking without staying locked around a car seat.
My practical rule is simple: focus on what keeps the lap belt tight, not just whether the shoulder belt clicks. This guide explains how the mechanisms work, how to use them, and how to recognize an unsafe installation.
In This Guide
- What Does Locking a Seat Belt Mean?
- Which Seat Belt Locking System Does Your Vehicle Use?
- How Do You Lock a Switchable Seat Belt?
- What If Your Seat Belt Does Not Have a Switchable Retractor?
- How Do You Check Whether the Installation Is Secure?
- Why Does Your Seat Belt Keep Loosening or Locking?
- Frequently Asked Questions
What Does Locking a Seat Belt Mean for Car Seat Installation?
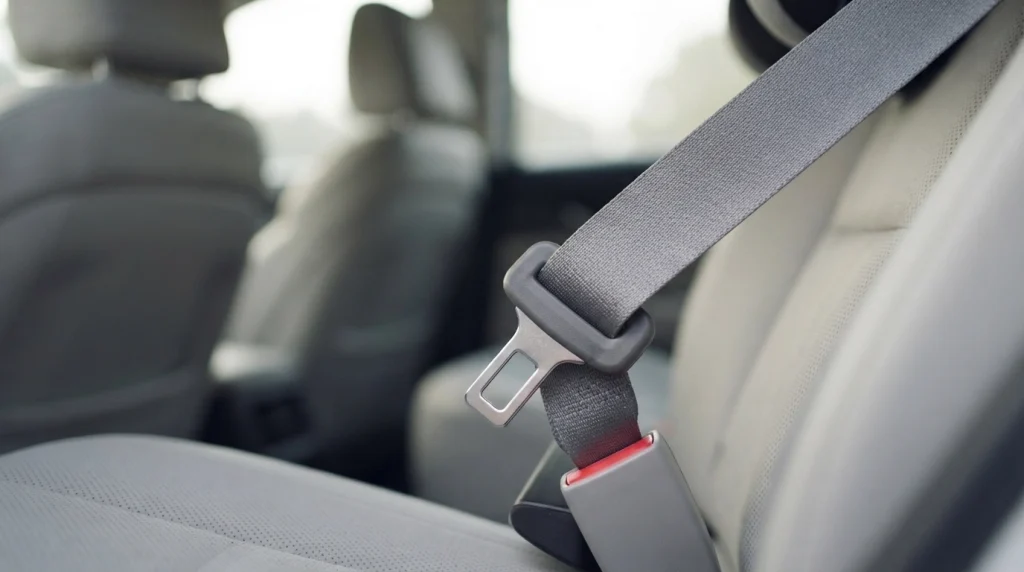
Locking a seat belt means securing its webbing so the lap portion cannot gradually loosen around a child restraint. This holds the installed seat in position during everyday driving and helps it function as designed during a crash.
A seat belt has several important parts:
- Webbing: The strong woven material that runs across the seat.
- Retractor: The mechanism that winds the belt back into the vehicle.
- Latch plate: The metal tongue inserted into the buckle.
- Buckle: The component that receives and secures the latch plate.
- Belt path: The designated opening through which the belt secures a child restraint.
Why Does the Seat Belt Need to Stay Locked?
A child restraint needs a secure connection to the vehicle. If the belt length changes freely during normal driving, the car seat can shift away from its intended position.
The locking system prevents this unwanted slack. It does not replace correct routing, tightening, recline adjustment, or other required installation steps.
Doesn’t Every Seat Belt Lock During an Accident?
Many belts use an emergency locking retractor, or ELR, which responds to sudden movement or vehicle deceleration. That emergency function differs from holding a child restraint tightly before a crash.
An ELR-only belt may extend during ordinary movement, even though it locks when pulled sharply. A suitable installation therefore needs a separate approved way to keep the lap belt tight.
The Indiana University Automotive Safety Program explains why identifying the retractor or latch plate is essential before installation.
Section Takeaway: Emergency locking protects occupants during sudden events, while car seat installation requires a system that keeps the restraint secure during normal use.
Which Seat Belt Locking System Does Your Vehicle Use?
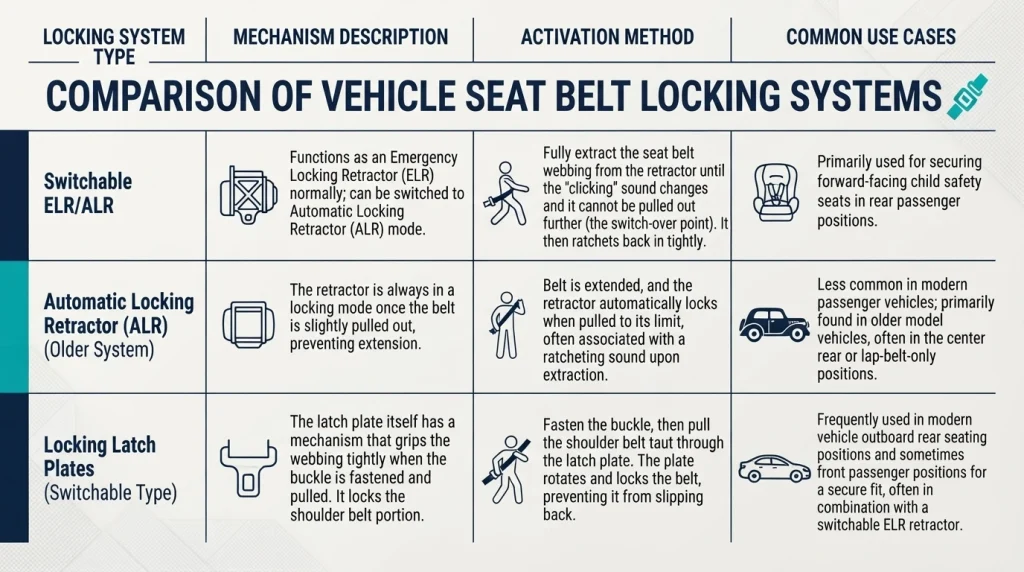
Vehicle seat belts can lock at the retractor or at the latch plate. Some child restraints also contain approved built-in mechanisms that secure the vehicle belt.
Identifying your system first prevents unnecessary adjustments and incorrect installation methods.
Switchable Emergency/Automatic Locking Retractor
A switchable retractor operates in emergency locking mode for normal passenger use. For child restraint installation, it can change to automatic locking mode, commonly called ALR.
In many vehicles, pulling the webbing fully out activates this mode. As the belt retracts, it takes up slack and prevents further extension until reset.
Automatic Locking Retractor
An automatic locking retractor allows the belt to tighten while preventing additional webbing from feeding out. Some systems operate in this mode without requiring a separate switching action.
The exact operation depends on the vehicle and seating position.
Locking or Cinching Latch Plate
Some vehicles use a latch plate that holds the lap portion of the belt at a fixed length. Tightening the belt activates the intended securing action without necessarily switching the retractor.
The latch plate’s angle and design matter. A belt that slowly slips through this hardware may need an approved correction.
Seat Belt Locking Methods Compared
| Locking Method | How It Works | Important Detail |
|---|---|---|
| Switchable ELR/ALR | Usually switches after full belt extension. | Common in newer passenger vehicles. |
| Automatic locking retractor | Allows tightening while restricting extension. | Operation depends on belt design. |
| Locking latch plate | Holds the lap belt at a fixed length. | May require no retractor switching. |
| Emergency locking only | Responds to sudden belt or vehicle movement. | Needs another approved locking method. |
| Car seat lock-off | Secures webbing within the child restraint. | Use only as instructed by both manufacturers. |
Don’t assume every rear seating position uses identical hardware. Check the specific position where you plan to install the child restraint.
How Do You Lock a Switchable Seat Belt for Car Seat Installation?
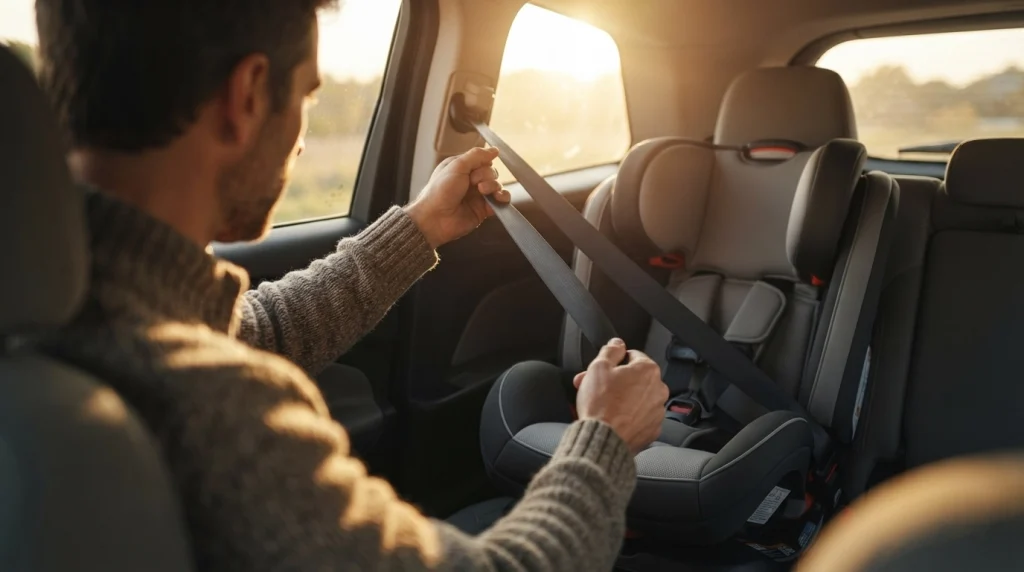
For a compatible switchable retractor, the basic method is to route and buckle the belt, extend the shoulder webbing completely, then feed it back while tightening. Follow the vehicle and car seat instructions for the precise order.
Step 1: Read Both Instruction Manuals
Find the child restraint’s approved installation method and the vehicle’s belt-locking instructions. Confirm that the selected seating position is suitable.
Pay attention to belt-path markings, recline requirements, and any restrictions involving inflatable seat belts or built-in lock-offs.
Step 2: Position the Child Safety Seat
Place the restraint in an approved rear seating position. Use the correct rear-facing or forward-facing orientation for the child’s size and car seat limits.
Adjust the recline according to the child restraint manufacturer before final tightening.
Step 3: Route and Buckle the Seat Belt
Pass the belt through the designated path and connect its latch plate to the vehicle buckle. Check that the webbing lies flat without twists.
Rear-facing and forward-facing belt paths often differ. Using the wrong one can compromise the installation.
Step 4: Activate Automatic Locking Mode
Slowly pull the shoulder belt all the way out of the retractor if your vehicle uses this switching method. Let the belt feed back into the mechanism.
Some retractors click during retraction. The more important confirmation is that the webbing cannot extend again while locking mode remains active.
Step 5: Tighten the Belt
Apply firm pressure to the child restraint near its belt path while removing slack from the lap portion. Feed excess webbing into the retractor as the belt tightens.
Check that the buckle and latch plate do not interfere with the belt path or the restraint’s tightening mechanism.
Step 6: Perform the Inch Test
Hold the restraint close to the belt path and move it side-to-side and front-to-back. Movement should not exceed one inch, approximately 2.5 centimeters, in either direction.
Some movement at the top of a rear-facing seat is normal. The belt-path test determines whether the installation is sufficiently tight.
Step 7: Confirm All Remaining Safety Requirements
- Check the approved recline angle for a rear-facing restraint.
- Attach and tighten the top tether for a forward-facing harnessed seat as instructed.
- Verify that the installation belt remains locked and secure.
- Check the harness fit before securing the child.
- Make sure the child restraint does not interfere with another passenger’s seat belt.
The Safe Kids Worldwide installation guide reinforces the importance of proper belt routing, the inch test, and top-tether use.
Section Takeaway: Switching the retractor is only one part of installation. Correct routing, belt tension, and the final security check are equally important.
What If Your Seat Belt Does Not Have a Switchable Retractor?
A belt that does not switch into automatic locking mode may still be suitable for car seat installation. The vehicle might use locking hardware at the latch plate, or the child restraint might supply an approved lock-off.
Using a Locking Latch Plate
With a compatible locking latch plate, route and buckle the belt as instructed. Then tighten the lap portion by pulling the appropriate webbing.
Check that the latch plate holds the lap belt securely. If it slips after tightening, don’t assume the installation is safe.
Using a Built-In Car Seat Lock-Off
A lock-off is a mechanism on certain child restraints that secures the vehicle seat belt. Its operation varies by manufacturer and model.
Some lock-offs replace the need to engage a vehicle retractor’s automatic locking mode. Others have specific requirements about which belt sections they secure or how they operate alongside a locked retractor.
Follow both manuals before choosing this method. Do not assume a belt-tightening feature automatically provides the same function as a locking device.
When Is a Separate Locking Clip Necessary?
Some older vehicles, particularly models built before the 1996 model-year lockability requirement, may need a separate locking device. This applies only to particular belt configurations.
A locking clip is not appropriate for every belt and must never substitute for a specialized belt-shortening clip. Incorrect hardware or placement can create a dangerous installation.
Consult a certified Child Passenger Safety Technician before attempting an unfamiliar locking-clip installation.
Pro tip: Check your vehicle owner’s manual and car seat instructions before adding or modifying any locking hardware.
How Do You Check Whether the Installation Is Secure?
A secure installation combines a properly locked belt with correct positioning and fit. Checking only the buckle or the retractor is not enough.
Check Movement at the Belt Path
Use your non-dominant hand to hold the restraint where the vehicle belt passes through it. Apply a firm, controlled side-to-side and front-to-back movement.
Anything beyond one inch means the installation needs adjustment. Avoid judging tightness by pulling on the upper shell, which can exaggerate normal movement.
Check Rear-Facing Installation Requirements
Rear-facing child restraints have manufacturer-specific recline requirements. Use the built-in angle indicator and follow any adjustment instructions.
Never place a rear-facing car seat in front of an active frontal airbag. The rear seat is the recommended location for children.
Check Forward-Facing Tether Installation
A forward-facing harnessed restraint normally uses a top tether to help limit forward head movement during a collision. Connect the tether to the designated vehicle anchor as instructed.
A seat belt lock does not replace the tether. The two components serve different purposes.
Remember That Booster Seats Work Differently
A belt-positioning booster primarily positions the vehicle seat belt across the child’s body. It does not use the same installation approach as a harnessed car seat.
Generally, the vehicle belt should operate normally for the seated child, unless the vehicle or booster manufacturer gives different instructions. Never apply harnessed-seat locking steps automatically to a booster.
The NHTSA vehicle and car seat parts guide explains the roles of seat belts, lower anchors, and tethers.
Why Does Your Seat Belt Keep Loosening or Locking Too Soon?
Most installation problems involve incorrect locking-mode selection, difficult belt geometry, or excess webbing. Start by identifying the cause instead of pulling harder.
The Belt Keeps Loosening
If a switchable retractor still allows webbing to extend, it may not have entered automatic locking mode. Let it retract fully to reset, then repeat the manufacturer’s procedure.
If the vehicle uses a locking latch plate, inspect whether the lap belt remains fixed after tightening. Persistent slipping requires a compatible remedy, not guesswork.
The Belt Locks Before You Finish Routing It
Pulling the belt sharply can activate its emergency locking feature. A switchable retractor may also enter automatic locking mode earlier than you intended.
Allow the belt to retract fully, provided nothing obstructs it. Restart slowly and follow the specified installation sequence.
The Car Seat Still Moves Too Much
Excessive movement can result from an incorrect belt path, insufficient tension, or buckle interference. A belt that appears locked can still leave the child restraint loose.
Recheck these common trouble spots:
- Wrong belt path: Confirm the correct path for the seat’s current orientation.
- Trapped slack: Tighten the lap portion while applying pressure near the belt path.
- Buckle interference: Check whether the buckle contacts the restraint incorrectly.
- Incompatible seat position: Review restrictions for the vehicle’s seating location.
- Unapproved accessories: Remove aftermarket padding or seat covers unless both manufacturers permit them.
When Should You Get Professional Help?
Seek assistance when the installation remains loose, the belt does not operate as described, or you cannot identify the locking system. Do not transport a child in an installation you know is insecure.
A certified Child Passenger Safety Technician can evaluate the vehicle and restraint combination. For damaged, frayed, or malfunctioning seat belt hardware, have the vehicle inspected by a qualified professional.
Section Takeaway: A secure car seat should not require improvisation or force. If the approved method fails, verify compatibility and get expert assistance.
Frequently Asked Questions
1. Do all seat belts lock when pulled all the way out?
No. Many modern vehicles have switchable retractors that activate automatic locking mode after full extension, but some belts use locking latch plates or other designs. Always check the vehicle owner’s manual before assuming the full-extension method applies.
2. How do I know if my car seat belt is locked?
For a switchable retractor, the webbing should retract but resist being pulled out again after activation. With a locking latch plate, confirm that the lap portion stays fixed, then check the installed child restraint for excessive movement at the belt path.
3. Can I install a car seat without locking the vehicle’s retractor?
Yes, when an approved locking latch plate or compatible built-in car seat lock-off secures the belt instead. The installation must follow both manufacturers’ instructions and keep the lap portion tight throughout normal driving.
4. Can I use both the seat belt and lower LATCH anchors?
Generally, no. A child restraint should normally use either the vehicle seat belt or the lower anchors for installation, unless both manufacturers explicitly permit simultaneous use. A top tether is different and should be used with forward-facing harnessed seats as directed.
5. Why does my seat belt click when I pull it out?
Clicking during retraction can indicate that a switchable retractor has entered automatic locking mode. However, clicking alone does not prove a proper installation; verify that the belt cannot extend and that the child restraint passes the inch test.
6. How do I unlock the seat belt after removing the car seat?
For many switchable retractors, unbuckle the belt and allow the webbing to retract fully. This resets the mechanism to normal emergency locking mode, but the correct procedure depends on the vehicle’s design and instructions.
7. Does a seat belt need to be locked when using a booster seat?
Not usually in the same way as a harnessed child restraint. The belt normally needs to move appropriately across the child while providing emergency protection, so follow the specific booster and vehicle instructions before engaging any locking mode.
Final Takeaway:
Understanding how a seat belt locks for car seat installation begins with identifying the correct locking mechanism. Once the belt is secured, verify the correct belt path, installation tightness, and every manufacturer-required safety feature.
Before your next drive, check the installation with both manuals available. If anything remains uncertain, arrange a hands-on inspection with a certified Child Passenger Safety Technician.

Daniel Brooks is an automotive writer and product researcher focused on car accessories, car tech, maintenance, and practical driving guides. At Plug-in Car World, he helps drivers make smarter automotive decisions through honest reviews and research-driven content.