How to Install a Car Seat in a Vehicle With a Non-Removable Headrest
Quick Answer
You can install a child car seat in a vehicle with a non-removable headrest if the car seat and vehicle manufacturers permit the resulting fit. Check whether the headrest pushes the child restraint forward, prevents proper adjustment, or creates a prohibited gap. Follow both instruction manuals and the NHTSA car seat installation guidelines before securing the seat.
Quick Installation Steps
- Check compatibility: Read both manuals for headrest, seatback contact, and installation restrictions.
- Inspect the headrest: Identify whether it is fixed, height-adjustable, or causing interference.
- Choose a suitable position: Try an approved rear seating location with adequate clearance.
- Secure the car seat: Use the approved seat belt or lower-anchor installation method.
- Attach the top tether: For forward-facing harnessed seats, connect it as directed by both manufacturers.
- Verify the fit: Check seat stability, headrest clearance, and your child’s restraint positioning.
Safety warning: Never cut, bend, force, or modify a vehicle headrest to accommodate a child seat. If the manuals do not permit the fit, choose another compatible seating position or child restraint.
A non-removable headrest can turn an ordinary car seat installation into a frustrating fitment problem. The child seat may lean forward, leave an unexpected gap, or fail to sit where its manufacturer intended.
When I evaluate car seat fitment, I start by examining the vehicle seatback and the child restraint together. This guide explains what to check, which adjustments may help, and when an installation should be rejected.
In This Guide
- Why Non-Removable Headrests Cause Installation Problems
- What to Check Before Installing the Car Seat
- How to Install a Forward-Facing Car Seat
- How to Install a High-Back Booster Seat
- Which Adjustments Are Safe and Which Should You Avoid?
- How to Check the Installation and Get Help
- Frequently Asked Questions
Why Do Non-Removable Headrests Cause Car Seat Installation Problems?
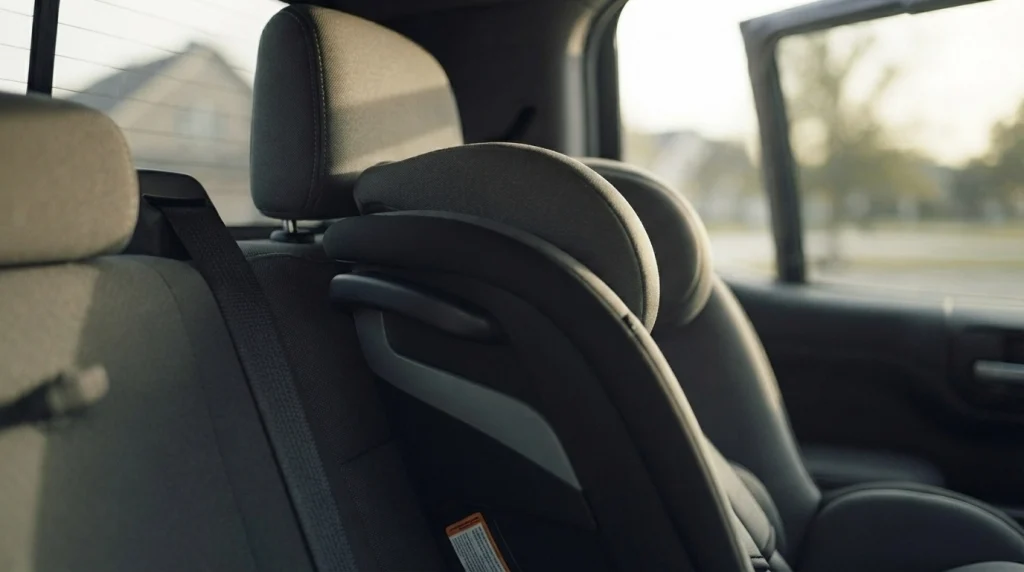
A non-removable headrest is a vehicle head restraint that cannot be detached through the manufacturer’s normal adjustment procedure. Some are completely fixed, while others allow limited height or angle adjustments.
These restraints help support an occupant’s head during certain crashes. However, their shape can interfere with a child restraint installed against the vehicle seatback.
How a Protruding Headrest Affects Fit
Some vehicle headrests angle forward or extend beyond the upper seatback. A tall forward-facing child seat may contact that projection before reaching its intended installed position.
Depending on the combination, this can cause several problems:
- Unexpected seatback gaps: The headrest pushes the upper child restraint away from the vehicle seat.
- Restricted headrest adjustment: The child’s seat headrest cannot rise to its required position.
- Incorrect booster positioning: The booster backrest cannot align as its instructions require.
- Installation difficulty: The child restraint cannot achieve an approved position even when secured tightly.
A visible gap is not automatically unsafe for every harnessed car seat. Some manufacturers permit certain gaps when their installation requirements are satisfied.
Other models require closer seatback contact. The child seat’s instructions determine whether a particular gap is acceptable.
Does the Problem Affect Rear-Facing Seats?
Rear-facing child restraints usually interact differently with vehicle headrests. Because they face the opposite direction, the upper vehicle headrest often does not create the same interference.
However, a rear-facing seat still needs its specified recline angle, base support, and clearance. Never assume compatibility without checking the manuals.
Why High-Back Boosters Need Special Attention
High-back booster seats position a child’s lap-and-shoulder belt and provide back and head support. Their backrests may extend directly into the space occupied by the vehicle headrest.
Some booster manufacturers prohibit interference or gaps caused by the headrest. This makes compatibility especially important before purchasing a booster.
What Should You Check Before Installing a Car Seat With a Fixed Headrest?
Start with the instruction manuals, not the seat belt. You need to confirm that the child restraint and the vehicle seating position are compatible.
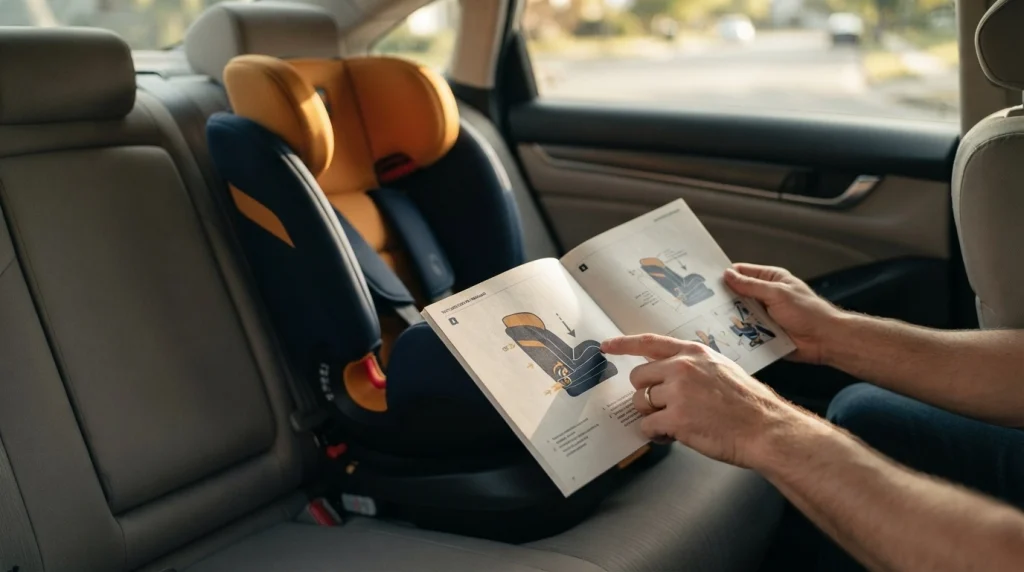
1. Read Both Instruction Manuals
Check the child restraint manual for vehicle seatback contact, headrest interference, allowed recline positions, and installation methods. Then review the vehicle manual for child-restraint locations and head restraint instructions.
Look for language about:
- Required contact between the child restraint and vehicle seatback.
- Vehicle headrest clearance and permitted adjustments.
- Approved seating positions and seatback recline settings.
- Lower-anchor availability and weight restrictions.
- Top tether anchor locations and approved tether routing.
- Permitted overhang of the child restraint base.
Manufacturer rules can differ substantially. For example, Britax’s installation guidance describes headrest adjustments and alternative seating positions for particular models.
That guidance applies to the identified products, not every car seat. Always check your exact model and its current instructions.
2. Inspect the Vehicle Seating Position
Stand beside the open rear door and examine the vehicle seatback. Check how far the headrest projects toward the passenger compartment.
Then place the empty child seat in position without securing it. This preliminary fit check helps reveal interference before you begin tightening the installation.
Look closely at the upper child seat shell, adjustable headrest, and base. Make sure the head restraint does not prevent required adjustments.
3. Identify the Correct Anchors
The lower anchors are metal attachment points located near the junction between the vehicle seatback and cushion. The top tether anchor is a separate attachment point for compatible forward-facing restraints.
Use only locations approved by the vehicle manufacturer. Never substitute a cargo hook or luggage tie-down for a tether anchor.
If you intend to install in the center rear position, check that the necessary anchors are approved there. Do not borrow adjacent lower anchors unless both manufacturers specifically permit that arrangement.
How Do You Install a Forward-Facing Car Seat With a Non-Removable Headrest?
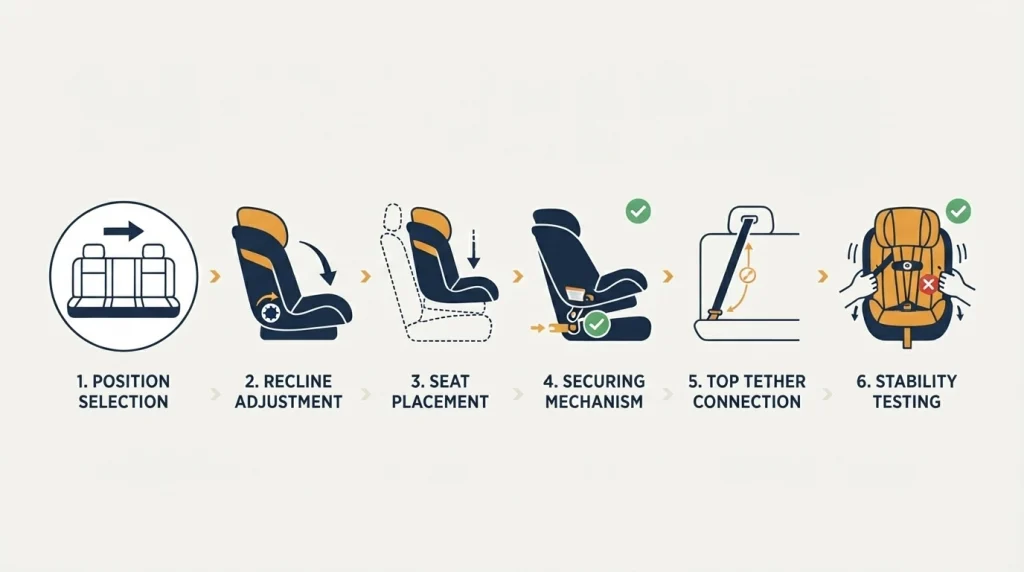
Install a forward-facing harnessed car seat only after confirming that its backrest and headrest fit are permitted. A tight seat belt or lower-anchor connection cannot correct prohibited headrest interference.
Step 1: Select an Approved Rear Seating Position
Choose a rear seat location allowed by both manuals. An outboard position may provide a better fit than the center, depending on seat geometry and anchor availability.
Do not assume the center position is automatically the best choice. A correctly installed restraint in an approved position is the priority.
Step 2: Set the Child Seat Recline
Adjust the child restraint to a forward-facing recline setting permitted for your child’s size and the vehicle. Consult the built-in recline indicator or manufacturer’s instructions when applicable.
Some manufacturers also permit limited vehicle seatback adjustments. Change the vehicle seatback angle only when both manuals allow it.
Step 3: Position the Car Seat Against the Vehicle Seatback
Place the child restraint on the vehicle cushion in its intended position. Inspect the area where the vehicle headrest meets the child seat’s upper backrest.
If the headrest pushes the child seat forward, do not force it backward. Recheck whether the child restraint manufacturer permits that gap or requires a different position.
Step 4: Secure the Car Seat
Use either the approved vehicle seat belt installation or the lower-anchor system. Do not combine both methods unless the car seat and vehicle instructions explicitly authorize doing so.
For a seat belt installation:
- Route the seat belt through the designated forward-facing belt path.
- Buckle the belt without twisting its webbing.
- Activate the locking mechanism specified in the manuals.
- Apply pressure in the manner instructed by the child seat manufacturer.
- Pull the belt tight and remove excess slack.
For a lower-anchor installation, connect the attachments to the approved anchors. Tighten the straps according to the child restraint instructions.
Check the lower-anchor child weight limit before choosing that method. A child may outgrow lower-anchor installation before outgrowing the harnessed seat.
Step 5: Connect the Top Tether
A top tether helps limit forward movement of a forward-facing child restraint during a crash. Follow its required routing around or over the vehicle headrest.
Some vehicles specify different tether paths depending on headrest design. Never improvise a route or attach the hook to unapproved hardware.
The NHTSA forward-facing installation instructions explain both seat belt and lower-anchor methods.
Step 6: Test the Installation
Grip the child restraint at the installation belt path. Pull it gently but firmly from side to side and front to back.
A correctly secured harnessed child seat should move no more than 1 inch (2.5 cm) at that location. Do not perform this stability check by pulling the top of the child seat.
Finally, confirm that the vehicle headrest has not altered the required recline, harness height, or permitted backrest contact.
How Do You Install a High-Back Booster Seat With a Fixed Headrest?
High-back booster installation differs from harnessed car seat installation. A booster primarily positions the vehicle lap-and-shoulder belt correctly on the child.
The vehicle headrest must not interfere with the booster in a way the booster manufacturer prohibits. A tight-looking fit is not enough.
Check Booster Backrest Compatibility
Place the booster on the approved rear vehicle seat. Inspect how the booster backrest contacts the vehicle seat and headrest.
Check that the booster:
- Rests on the vehicle seat as its instructions require.
- Does not tilt forward because of the vehicle headrest.
- Allows its own adjustable headrest to reach the correct height.
- Meets the manufacturer’s backrest gap and support requirements.
- Does not exceed any permitted base overhang.
If the vehicle headrest prevents proper positioning, try another approved seating location. Do not wedge the booster against the headrest to force contact.
Position the Vehicle Seat Belt Correctly
Once you confirm compatibility, have the child sit upright in the booster. Route the vehicle lap-and-shoulder belt using the booster manufacturer’s belt guides.
Check these three points:
- The lap belt lies low across the upper thighs, not the abdomen.
- The shoulder belt crosses the center of the shoulder and chest.
- The child remains correctly positioned throughout the trip.
Follow the NHTSA booster seat installation guide for further belt-fitting instructions.
Can You Use a Backless Booster Instead?
A backless booster may avoid certain headrest interference problems. However, it is an appropriate alternative only when the child meets its requirements and the vehicle provides adequate head support.
The vehicle must also have a compatible lap-and-shoulder belt. Never use a backless booster with a lap-only belt.
Do not switch a younger child from a harnessed car seat merely to solve headrest interference. Continue using an age- and size-appropriate restraint.
Which Headrest Adjustments Are Safe, and Which Should You Avoid?
The safest solution often involves choosing a different approved configuration rather than changing vehicle hardware. Not every adjustment works with every child restraint.
Comparing Possible Installation Solutions
| Solution | When Appropriate | Main Limitation |
|---|---|---|
| Raise an adjustable headrest | Both manuals permit the adjustment | May not provide enough clearance |
| Adjust child seat recline | An approved recline position improves fit | Must remain within allowed settings |
| Adjust vehicle seatback | Both manufacturers explicitly allow it | May be prohibited, especially for boosters |
| Move to another rear seat | The new position is approved and compatible | Anchor layouts and seat shapes vary |
| Choose a different child restraint | Current seat cannot achieve an approved fit | Requires verifying another model’s compatibility |
| Modify or force the headrest | Not an acceptable DIY installation solution | Can compromise vehicle safety equipment |
Common Installation Mistakes
Headrest interference often tempts drivers to make adjustments that the manufacturers never approved. Avoid these shortcuts:
- Forcing the car seat backward: Pressure cannot make a prohibited fit acceptable.
- Adding cushions or wedges: Unapproved objects can change how the restraint sits or performs.
- Removing headrest components: Do not disassemble, cut, bend, or alter fixed safety equipment.
- Over-reclining the vehicle seat: Excessive recline may violate the child restraint or vehicle instructions.
- Ignoring tether requirements: A tight lower installation does not replace a required top tether.
- Assuming every gap is acceptable: Gap requirements vary among restraint models and modes.
One detail is especially easy to overlook. A combination seat may permit a certain gap in harness mode but prohibit it when converted to booster mode.
Check the instructions again whenever changing the seat’s operating mode. Compatibility is not necessarily permanent.
How Can You Tell Whether the Car Seat Installation Is Safe?
A successful installation satisfies both manufacturers’ requirements and fits the child correctly. Headrest clearance is only one part of that assessment.
Perform a Final Safety Check
Before driving, review the following checklist:
- Approved location: The rear seating position is permitted for the child restraint.
- Compatible contact: Any gap or headrest contact meets the car seat instructions.
- Secure installation: A harnessed seat moves no more than 1 inch at its belt path.
- Correct tether: The forward-facing top tether follows its approved route and attachment instructions.
- Proper recline: The child restraint and vehicle seatback remain within permitted settings.
- Correct harness height: Rear-facing harness straps are at or below the shoulders; forward-facing straps are at or above them, subject to the seat manual.
- Snug harness: The harness passes the pinch test and the chest clip sits at armpit level.
- Correct booster belt fit: The lap-and-shoulder belt lies across the child’s thighs, shoulder, and chest as directed.
Check the installation again after moving the child seat or changing its configuration. Reinspect the fit as your child grows and the headrest height changes.
When Should You Contact a Certified Technician?
Seek professional help when the manuals seem unclear or the vehicle headrest prevents an approved fit. This is especially useful with tall harnessed seats, combination restraints, and high-back boosters.
A certified Child Passenger Safety Technician (CPST) can examine the exact child restraint and vehicle combination. They can also demonstrate proper installation and explain manufacturer restrictions.
In the United States, you can find assistance through the Safe Kids car seat inspection program.
Bring the vehicle manual, child restraint manual, and child seat model information. If possible, have the child available for a complete fit assessment.
Pro tip: As of 2026, there is no universal adjustment that makes every fixed-headrest vehicle compatible with every child restraint. Confirm unresolved fitment questions directly with the vehicle manufacturer, the child seat manufacturer, or a certified technician before transporting a child in that setup.
Frequently Asked Questions
1. Can I install a car seat without removing the vehicle headrest?
Yes, if both manufacturers permit the installation and the headrest does not prevent the required fit. Some harnessed seats allow limited gaps, while other restraints require different backrest contact. Check the instructions for your exact car seat model, installation direction, and vehicle seating position.
2. Is a gap behind a forward-facing car seat always unsafe?
No. Certain harnessed child restraints permit gaps behind parts of their shells when their other installation requirements are satisfied. Other models prohibit particular gaps. Never judge safety by gap size alone; follow the child restraint manufacturer’s instructions and confirm that the seat installs securely.
3. Can I recline my back seat to make the car seat fit?
Only if the vehicle and child restraint manufacturers permit the specific adjustment. Some forward-facing installations allow limited seatback recline, while booster seat instructions may require a more upright position. Do not use vehicle seatback recline to bypass a headrest interference restriction.
4. What if the vehicle headrest pushes my booster seat forward?
Do not use the booster in that position unless its manufacturer explicitly permits the resulting fit. Check for an approved headrest adjustment or try a different rear seating position. If neither works, select another booster compatible with your vehicle and child.
5. Can I use a backless booster if my vehicle has a fixed headrest?
Possibly. A backless booster can work when the child meets its requirements, the vehicle provides suitable head support, and a compatible lap-and-shoulder belt is available. The fixed headrest must not interfere with correct seating or belt positioning. Follow the booster and vehicle instructions.
6. Does the top tether go over or around a non-removable headrest?
That depends on the vehicle’s specified tether routing and the car seat instructions. Some vehicle manufacturers require a particular path over, under, or around the headrest. Use the designated tether anchor and approved route. Never improvise by attaching the tether to the headrest itself.
7. What should I do if no car seat fits properly?
Stop attempting to force the installation. Contact the child seat manufacturer, vehicle manufacturer, or a certified Child Passenger Safety Technician. They may identify an approved seating location or compatible restraint. Do not transport a child using an installation that violates either manufacturer’s instructions.
The bottom line: A non-removable headrest does not automatically prevent safe child car seat installation. The important factors are compatibility, permitted seatback contact, secure attachment, and correct child positioning.
Before your next drive, review both manuals and check the complete setup. If the headrest prevents an approved installation, choose another compatible position or restraint rather than modifying vehicle safety equipment.

Daniel Brooks is an automotive writer and product researcher focused on car accessories, car tech, maintenance, and practical driving guides. At Plug-in Car World, he helps drivers make smarter automotive decisions through honest reviews and research-driven content.